
To temper chocolate without tears, use a precise temperature map: melt to 45-50°C (113-122°F), then cool to about 27°C (80.6°F) to form seed crystals. Reheat gently to 31-32°C (87.8-89.6°F) for dark chocolate (lower for milk or white). Maintaining exact temperatures ensures shiny, tear-free results. Keep your temperature control steady, especially when working with seedless ganache and cocoa butter ratios. Master these steps, and you’ll achieve flawless, glossy chocolates every time.
Key Takeaways
- Melt chocolate to 45-50°C (113-122°F) to fully break down fats and solids.
- Cool to around 27°C (80.6°F) to promote stable seed crystal formation.
- Reheat gently to 31-32°C (87.8-89.6°F) for dark chocolate, lower for milk/white, to achieve proper temper.
- Use a precise thermometer to monitor temperature changes throughout the process.
- Maintain consistent temperatures during working to prevent fat bloom and ensure glossy, tear-free chocolate.
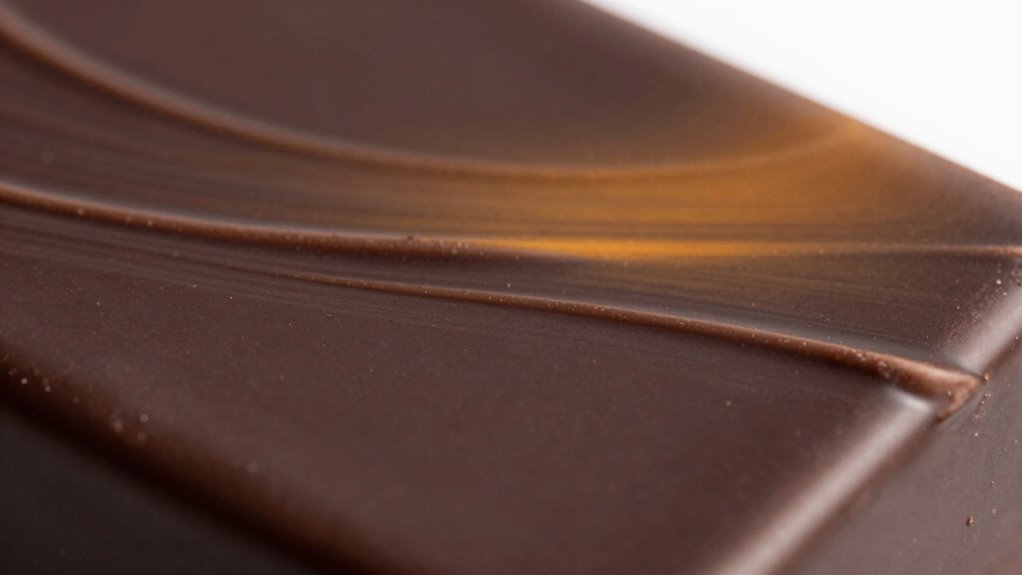
Tempering chocolate can seem intimidating, but with the right techniques, you can achieve shiny, smooth results without frustration. One key element in this process is understanding the importance of seedless ganache and how cocoa butter ratios influence the final appearance and texture of your chocolate. Seedless ganache, free of any bits or impurities, helps guarantee a consistent melt and coat, making it easier to control your tempering process. When preparing ganache, focusing on the correct cocoa butter ratios is essential. Too much cocoa butter can cause the chocolate to become too soft and lose its shine, while too little might make it brittle and dull. Striking the right balance ensures your chocolate will set with a glossy finish and a satisfying snap.
Proper seedless ganache and cocoa butter ratios are key for glossy,stable chocolates.
To start, you’ll want to melt your chocolate carefully, typically using a double boiler or microwave in short bursts. As you melt, pay attention to the temperature map, which guides you through the different stages of tempering. The initial melting phase should bring your chocolate to around 45-50°C (113-122°F), fully melting all cocoa solids and fats. Once melted, you cool your chocolate to about 27°C (80.6°F), allowing seed crystals to form. This step is vital—these seed crystals act as the foundation for the stable crystal structure that yields that shiny, firm finish. Then, gently reheat the chocolate to about 31-32°C (87.8-89.6°F) for dark chocolate, or slightly lower for milk and white chocolates. This precise temperature control is what produces that smooth, glossy surface.
Using a thermometer is your best friend here; it provides the accuracy you need to avoid overheating or undercooling. When working with seedless ganache, you might find it helpful to incorporate a small amount of tempered chocolate into your ganache to seed it, ensuring a smoother, more stable coating. Remember, cocoa butter ratios also matter in this phase. Adjusting the ratio in your ganache impacts how easily it will set and shine. A proper ratio promotes a uniform texture and prevents blooming—those unattractive whitish streaks caused by fat migration. Additionally, understanding the biochemistry of cocoa butter can help you fine-tune your tempering for optimal results.
Finally, once your chocolate hits the right temperature, keep working with it until it’s glossy and fluid. Pour, spread, or dip your treats, confident in your mastery of the temperature map. Achieving perfect tempering isn’t about luck; it’s about precision, patience, and understanding how seedless ganache and cocoa butter ratios influence your chocolate’s final look and feel. With these tips, you’ll turn what once seemed complex into a straightforward, satisfying process—giving you glossy, professional-quality chocolates every time.
Frequently Asked Questions
Can I Temper Chocolate Using a Microwave Instead of a Stovetop?
Yes, you can temper chocolate using a microwave instead of a stovetop. Just make certain your microwave is microwave-safe and use short bursts, stirring frequently to prevent overheating. This method aligns with good chocolate melting techniques, helping you control the temperature and avoid burning. Keep a thermometer handy, and follow proper tempering steps to achieve glossy, smooth chocolate without tears. It’s quick, convenient, and effective when done carefully.
What Are Common Mistakes That Cause Tempered Chocolate to Seize?
Did you know that over 60% of home tempering failures are due to improper cooling? You cause your chocolate to seize when you experience temperature fluctuations or rush the cooling process. To avoid this, keep the chocolate at a stable temperature and cool it gradually. Avoid stirring or exposing it to drafts, as these mistakes can disrupt crystallization, resulting in dull, streaky, or seized chocolate.
How Do Humidity Levels Affect Chocolate Tempering?
Humidity levels critically impact chocolate tempering because excess moisture can cause the chocolate to seize or develop a dull finish. You should control the environment by keeping humidity low, ideally below 50%, to guarantee smooth tempering. Use a dehumidifier or air conditioning if needed, and avoid working near sinks or humid areas. Proper environment control helps maintain the correct temperature and prevents moisture from ruining your tempered chocolate.
Is It Necessary to Use a Thermometer for All Chocolate Types?
Think of chocolate tempering as steering a river; a thermometer is your compass. For some chocolate types, like dark chocolate, it’s essential to use a thermometer to hit precise temperatures. Others, like tempered milk or white chocolate, benefit from it but can sometimes be managed by touch. Ultimately, a thermometer’s necessity depends on your skill and the chocolate type, ensuring smooth, shiny results every time.
Can Tempered Chocolate Be Stored for Later Use Without Losing Quality?
Yes, tempered chocolate can be stored for later use without losing quality if you handle chocolate storage properly. Keep it in an airtight container at a cool, consistent temperature, ideally around 60-70°F (15-21°C). Avoid moisture and temperature fluctuations, which can cause blooming or spoilage. Proper storage guarantees quality preservation, maintaining its glossy appearance and snap, so your chocolate stays perfect for your next project.
Conclusion
Mastering chocolate tempering is like revealing a secret garden—once you find the right temperature map, smooth, glossy results bloom effortlessly. Don’t let fear melt away your confidence; with precision and patience, you’ll turn any batch into a shiny masterpiece. Remember, every perfect tempering session is a step closer to chocolate that’s as stunning as it is delicious. So, keep your thermometer close and your spirits high—sweet success is just a few degrees away.