
To avoid overproofing, use your proofing tools carefully by monitoring the dough’s behavior closely. Keep the temperature steady between 75°F–80°F and use timers to track fermentation time, adjusting based on dough responsiveness. Pay attention to visual cues like dough elasticity and size. Use proofing baskets and covers to create a controlled environment. By balancing timing, temperature, and observation, you can master perfect proofing – and there’s more to discover on how to refine your process.
Key Takeaways
- Use timers to monitor fermentation duration and prevent excessive rising.
- Maintain proofing temperature between 75°F–80°F for optimal yeast activity.
- Observe dough’s visual and tactile cues to determine when it’s properly proofed.
- Use proofing baskets and covers to create a consistent, humid environment.
- Regularly check dough to avoid overproofing, adjusting time based on dough behavior.

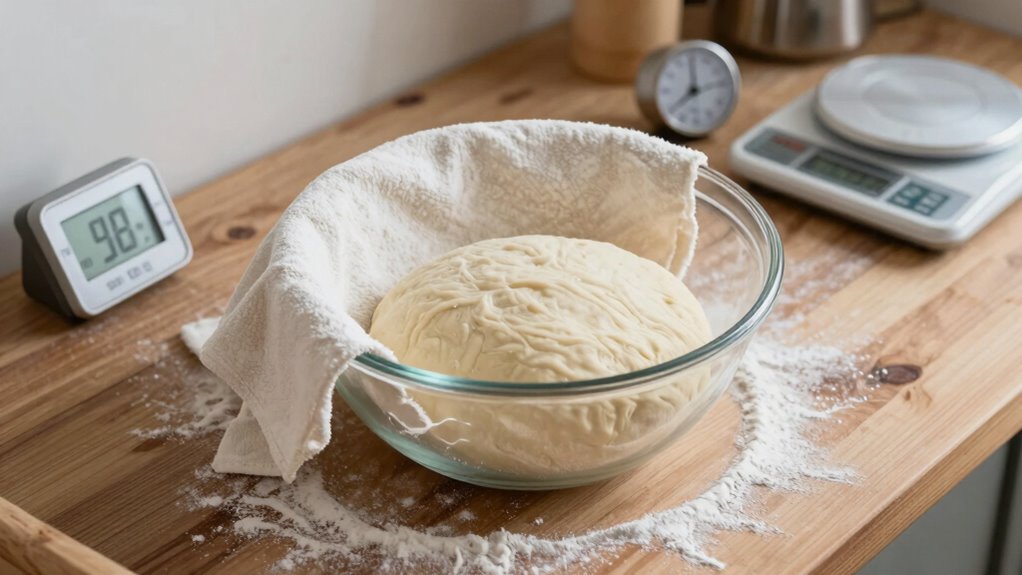
Proofing tools are essential for achieving perfect bread dough, but using them improperly can lead to overproofing. To avoid this, you need to focus on fermentation control and temperature management. These two elements are key to ensuring your dough rises just enough without over-expanding and collapsing. Proper fermentation control means understanding how long your dough should rest and rise, which varies depending on the recipe, ingredients, and environment. Using a timer alongside your proofing tools helps you monitor the process closely, preventing accidental overproofing. Keep in mind that the goal is to allow the dough to develop flavor and structure without becoming overly airy or weak. Additionally, understanding the fermentation process can help you better anticipate how your dough will behave during proofing. This process is also influenced by the yeast activity, which is highly sensitive to environmental conditions. Temperature management plays a crucial role in controlling fermentation. yeast activity is highly sensitive to temperature; if it’s too warm, fermentation speeds up, risking overproofing, while if it’s too cold, the process slows down, possibly under-proofing the dough. The ideal temperature range for proofing is typically between 75°F and 80°F (24°C to 27°C). To maintain this, you might use a proofing box, a warm spot in your kitchen, or even a slightly warm oven. Consistency here is vital. Sudden fluctuations in temperature can cause uneven fermentation, leading to inconsistent results. Using a thermometer to monitor the environment and your dough’s internal temperature helps you keep everything within optimal ranges. Many bakers find that using a digital scale along with timers helps them track how much the dough has expanded, giving a tangible measure to prevent overproofing. You can also use your proofing tools, such as proofing baskets or covers, to create a controlled environment that retains moisture and warmth, further regulating fermentation. Understanding temperature’s influence on yeast activity can help you fine-tune your proofing process for better results. Moreover, paying attention to dough behavior during proofing can provide valuable clues about when your dough is ready. Developing a keen sense of gluten development also plays a role in recognizing optimal proofing. Ultimately, successful proofing hinges on your ability to balance fermentation control and temperature management. Your proofing tools are there to assist, but their effectiveness depends on your attentiveness and adjustments based on dough behavior. By understanding how temperature influences yeast activity and managing your environment accordingly, you can prevent overproofing. Keep an eye on your dough’s progress, use precise timing, and maintain a stable proofing environment. This way, you’ll harness your proofing tools effectively, ensuring your bread rises perfectly—fluffy, flavorful, and beautifully structured—without the risk of overproofing.

Sourdough Proofing Basket Gift Set, 9" Round and 10" Oval Banneton Bread Baking Supplies, Sourdough Baskets with Bread Lame, Danish Whish, Bowl Scraper, Sourdough Scraper, and Linen Liner
What You Get: 1 9-inch round banneton bread proofing basket , 1 10-inch oval proofing basket, 2 liners,…
As an affiliate, we earn on qualifying purchases.
As an affiliate, we earn on qualifying purchases.
Frequently Asked Questions
Can Proofing Tools Be Reused for Different Doughs?
Yes, proofing tools can be reused for different doughs. Just make sure to adjust for dough hydration levels and yeast activity. Clean them thoroughly after each use to prevent cross-contamination and lingering flavors. This way, you maintain the right environment for each dough type, ensuring consistent proofing results. Proper cleaning and awareness of dough properties help you avoid overproofing and achieve perfect rise every time.
How Do I Adjust Proofing Time for Varying Dough Types?
Did you know that adjusting proofing time by just 10-15 minutes can markedly impact dough quality? To handle varying dough types, focus on fermentation control and dough elasticity. You should monitor how quickly your dough doubles in size and feel its elasticity. For softer, richer doughs, shorten proofing; for firmer doughs, extend it. Always observe, and tweak your timing based on the dough’s response for perfect results.
Are There Alternative Methods to Proofing Tools?
Yes, you can try alternative proofing environments like a warm, humid spot in your kitchen or a proofing box. To guarantee they work well, maintain your proofing tools properly by cleaning and adjusting humidity levels. These methods help proof dough without relying solely on traditional proofing tools, giving you more flexibility. Always monitor dough closely to prevent overproofing, regardless of the environment or tools used.
What’s the Ideal Temperature for Proofing Without Overproofing?
The ideal temperature for proofing without overproofing is around 75°F (24°C). You should focus on temperature control and maintain consistent humidity levels, ideally around 75%. Too warm, and the dough overproofs quickly; too cold, and it slows down fermentation. Keep the environment steady, using proofing boxes or warm spots in your house, and monitor humidity to guarantee your dough rises perfectly without overproofing.
How Can I Tell if Dough Is Overproofed Using Proofing Tools?
Think of your dough as a balloon; overproofing is like overinflating it until it bursts. You can tell if it’s overproofed by gently pressing the dough with your finger—if it slowly springs back, it’s just right. If it leaves a dent, gluten development has gone too far, and fermentation rate has peaked. Use your proofing tools to monitor these signs, ensuring perfect rise without risking overproofing.
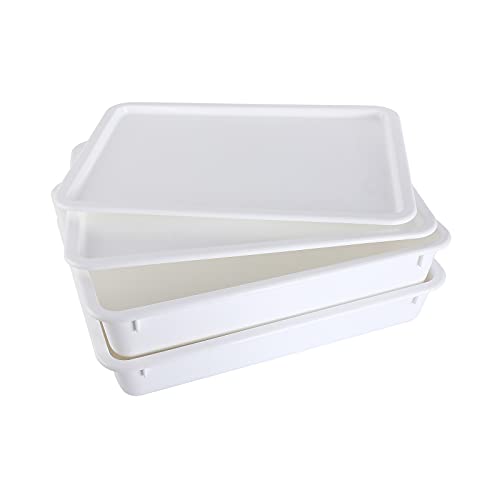
GSM Brands Pizza Dough Proofing Box – Stackable Commercial Quality Trays with Covers (17.25 x 13 Inches) – 2 Trays and 2 Covers
COMMERCIAL QUALITY: Our dough proofing boxes are generously sized at 17.25 x 13 x 3.54" with covers and…
As an affiliate, we earn on qualifying purchases.
As an affiliate, we earn on qualifying purchases.
Conclusion
Now that you’ve learned how to use your proofing tools wisely, the secret to perfect dough remains just a moment away. Overproofing can sneak up when you least expect it, threatening your bakery’s masterpiece. With a watchful eye and the right techniques, you’ll catch the signs before it’s too late. Will your next loaf be flawless or fall victim to overproofing? The key lies in your hands—are you ready to master the delicate balance?

Alpha Grillers Meat Thermometer Digital – Instant Read Food Thermometer for Cooking & Grilling – Professional Kitchen Fathers Day Gift for Dad Men Him Husband
Instant Read Food Thermometer | Our instant read thermometer features a temperature probe and advanced, highly accurate technology…
As an affiliate, we earn on qualifying purchases.
As an affiliate, we earn on qualifying purchases.

5.3QT Dough Kneader Machine with Timer & Fermentation, Electric Dough Mixer for Bread, Pizza, Pasta & Sourdough, Up to 1.4kg Dough Maker for Home Baking Hands-Free Kneading Machine, 304 Bowl
【Designed Specifically for Dough, Not Just Mixing】 Unlike traditional mixers, this machine is built for kneading dough efficiently,…
As an affiliate, we earn on qualifying purchases.
As an affiliate, we earn on qualifying purchases.