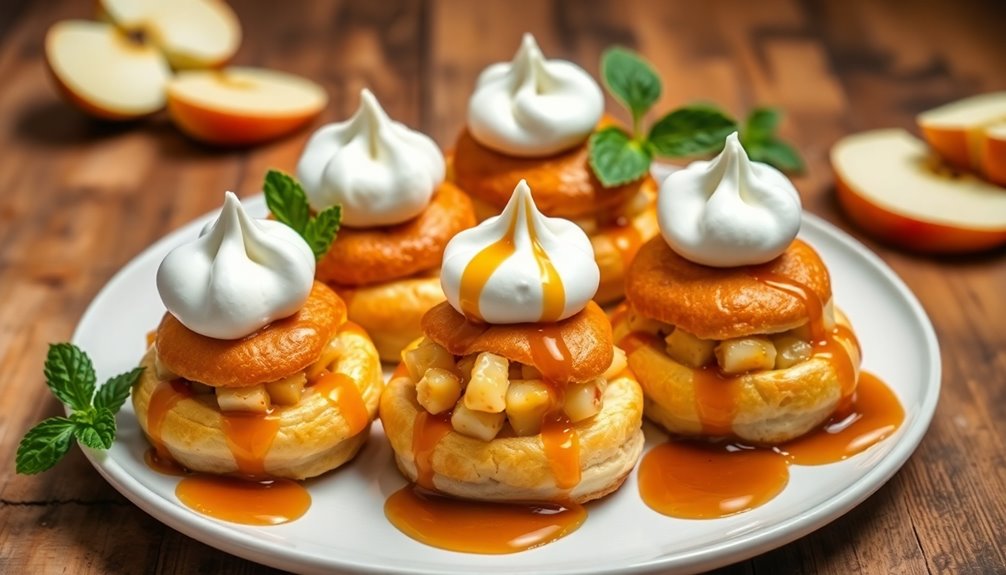

Apples in choux pastry create a delightful contrast between light, airy pastry and the sweet-tart flavor of Granny Smith apples. As you prepare choux pastry, you'll find the crisp shells perfectly complement the soft, flavorful apple filling. Adding a drizzle of salted caramel enhances the richness and balances sweetness. For a unique twist, consider incorporating chia seeds or serving with fresh ingredients. There's so much more to explore about perfecting this dessert and its enticing variations.
History
Choux pastry has a rich history that dates back to the 16th century in France, where chef Pantarelli first developed this unique dough.
Choux pastry, a unique dough, originated in 16th century France thanks to chef Pantarelli's innovative techniques.
Over the years, it gained fame thanks to pastry chef Marie-Antoine Carême in the early 19th century.
Traditionally, choux pastry fillings have evolved, with apples becoming a popular choice, especially in autumn desserts.
Granny Smith apples are often selected for their tartness, creating a delightful contrast with sweet cream in cream puffs.
This combination reflects the French culinary tradition of using seasonal ingredients in dessert recipes.
Modern takes, like cinnamon apple cream puffs, showcase the versatility of choux pastry, allowing it to harmonize beautifully with various flavors, including fruit, and enhancing its appeal in contemporary baking.
Recipe
To begin, you'll prepare the apple filling by cooking diced Granny Smith apples with lemon juice, sugar, and cinnamon until they're tender.
While the apples cool, you'll whip the mascarpone cheese to a light and fluffy consistency and prepare the choux pastry from scratch.
Once baked, the choux buns will be filled just before serving to ensure they remain crisp and airy, creating a delightful bite when enjoyed fresh.
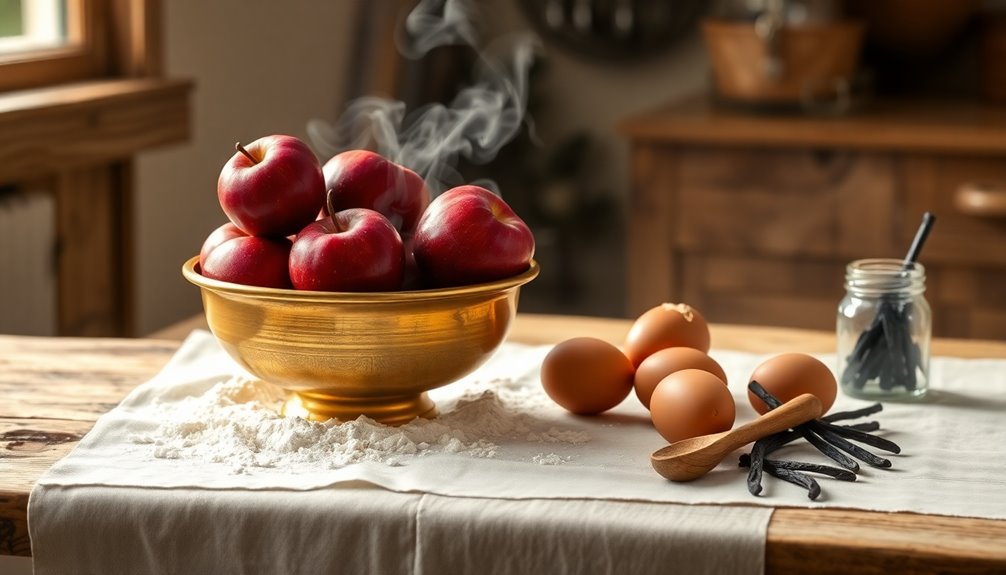
Ingredients:
- 1 cup water
- 1/2 cup milk
- 1/2 cup unsalted butter
- 1 cup all-purpose flour
- 4 large eggs
- 1 tablespoon sugar
- 3 Granny Smith apples, diced
- 1 tablespoon lemon juice
- 1 teaspoon cinnamon
- 1/4 cup sugar (for apples)
- Whipped mascarpone cheese
- Salted caramel sauce (for drizzling)
Cooking Instructions:
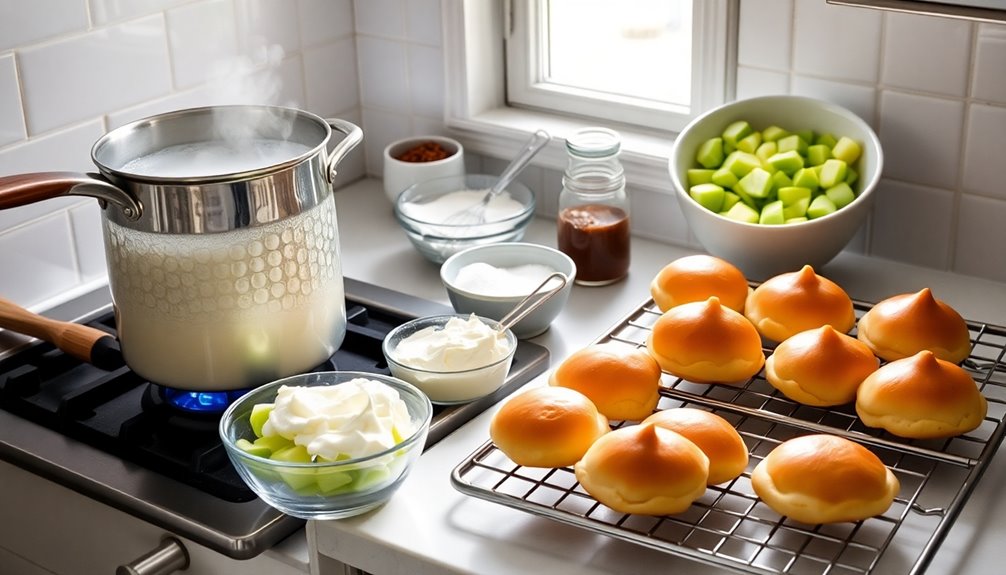
In a saucepan, combine water, milk, and butter, and bring to a boil.
Once boiling, remove from heat and quickly stir in the flour and sugar until a dough forms.
Return to low heat and cook for a couple of minutes, stirring constantly.
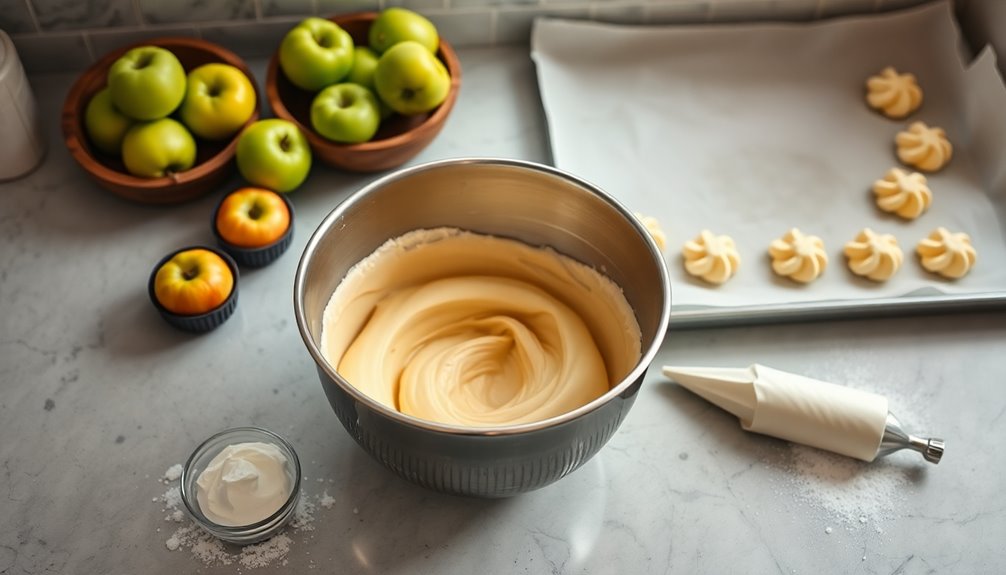
Remove from heat and let cool slightly before adding eggs one at a time, mixing until smooth.
Pipe small rounds onto a baking sheet and bake at 400°F (200°C) until puffed and golden brown.
Meanwhile, cook the diced apples with lemon juice, sugar, and cinnamon in a pan over medium heat until soft, then let cool.
Once the choux buns have cooled, fill them with the apple mixture and whipped mascarpone, then drizzle with salted caramel before serving.
Extra Tips:
For the best results, ensure that your choux buns are filled just before serving to keep their outer layer crisp.
You can also experiment with different fillings or toppings, such as adding chopped nuts for extra crunch or using different varieties of apples for a unique twist.
When piping the choux pastry, aim for uniform sizes to ensure even baking.
Enjoy the delightful combination of flavors and textures in this apple-filled choux pastry dessert!
Cooking Steps

To start making your choux pastry, gather all the ingredients and prepare the dough.
Don't forget to chill the dough before piping it onto the baking sheet for the best results.
Gradually add the eggs while mixing well to ensure a smooth texture.
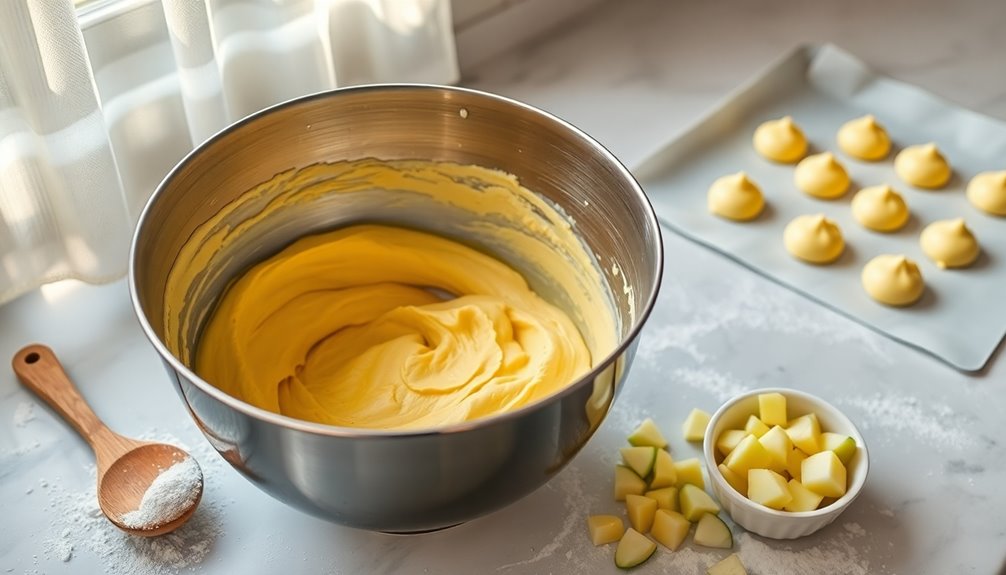
Step 1. Prepare Choux Pastry Ingredients

Gathering the right ingredients is essential for making perfect choux pastry. You'll need whole milk, water, unsalted butter, granulated sugar, kosher salt, and high-protein bread flour.
Start by measuring equal parts of milk and water for the correct balance. Heat them with butter, sugar, and salt until simmering, then add the flour to form a smooth dough.
Cook the dough for 2-3 minutes to evaporate moisture before allowing it to cool slightly. Next, incorporate room temperature eggs, one at a time, to achieve the right consistency.
For filling the choux, prepare apple compote by cooking apples into small pieces.
Step 2. Chill Dough Before Piping
Chilling your choux dough for about 30 minutes is crucial for achieving the best results. This step solidifies the fat, creating a more stable structure when you start piping. During this time, improved air quality can also be beneficial for your overall baking environment, as it helps eliminate odors that could affect the dough's flavor. Additionally, using unsalted butter can enhance the dough's richness without overwhelming the other flavors.
As the dough cools, it also helps prevent the eggs from cooking or scrambling, resulting in a smoother texture. The ideal chilling time ensures the dough remains pliable and easy to work with, which is essential for effective piping. To prevent drying, cover the dough with plastic wrap during the chilling process. This cooling phase not only helps maintain the dough's shape but can also improve the rise in the oven, leading to light, airy pastries. Additionally, understanding the nutritional composition of butter used in your pastry can enhance the overall flavor and texture of the final product.
Step 3. Pipe Dough Onto Baking Sheet
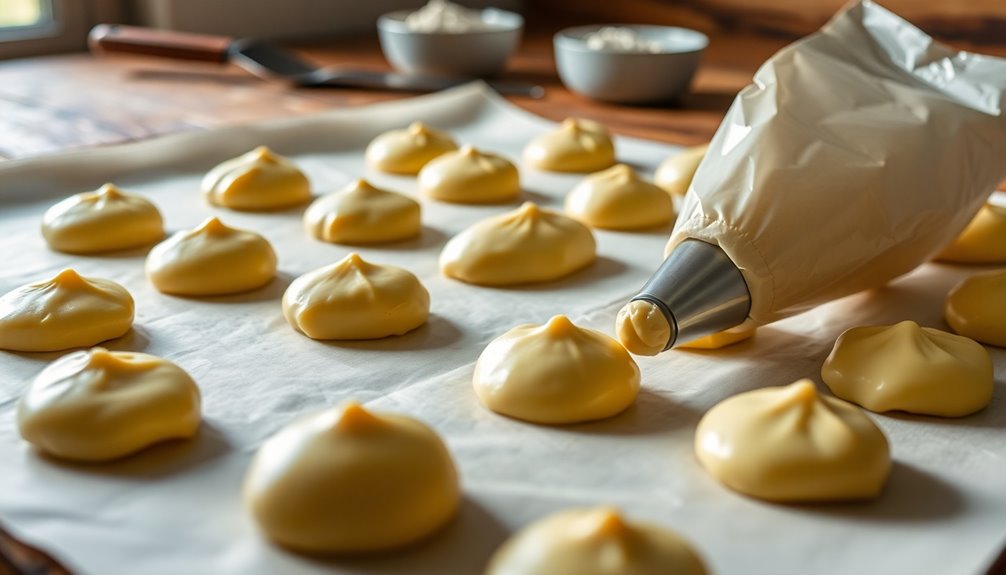
When you're ready to pipe the choux dough onto the baking sheet, grab a 1/2-inch pastry tip for the best results.
Make sure your dough is smooth and glossy, as this will ensure the best rise and texture in your baked treats. Pipe mounds that are about 1.5 inches in diameter, leaving enough space between them to expand.
As you work, use drawn circles on the baking sheet as a guide for uniformity. Once piped, top each mound with a frozen craquelin disk to add crunch and sweetness.
Bake the choux at 400°F for the first 20 minutes, then reduce to 350°F for 10-15 minutes until they're golden brown and fully puffed, ready to be filled with apples.
Step 4. Chill Before Baking
After you've piped the choux dough and topped each mound with the frozen craquelin disks, it's time to chill everything before baking.
Place the tray in the refrigerator for at least one hour. This chilling step is crucial; it ensures the craquelin maintains its shape, providing a delightful crunch atop your choux buns.
By allowing the craquelin to be frozen, you prevent it from melting during baking, which helps create a uniform, attractive finish.
Additionally, chilling the filled choux buns enhances the flavors and allows the filling to set properly.
This proper chilling method also prevents the choux pastry from collapsing, ensuring a light and airy texture in your final baked pastry.
Step 5. Add Eggs Gradually, Mixing Well
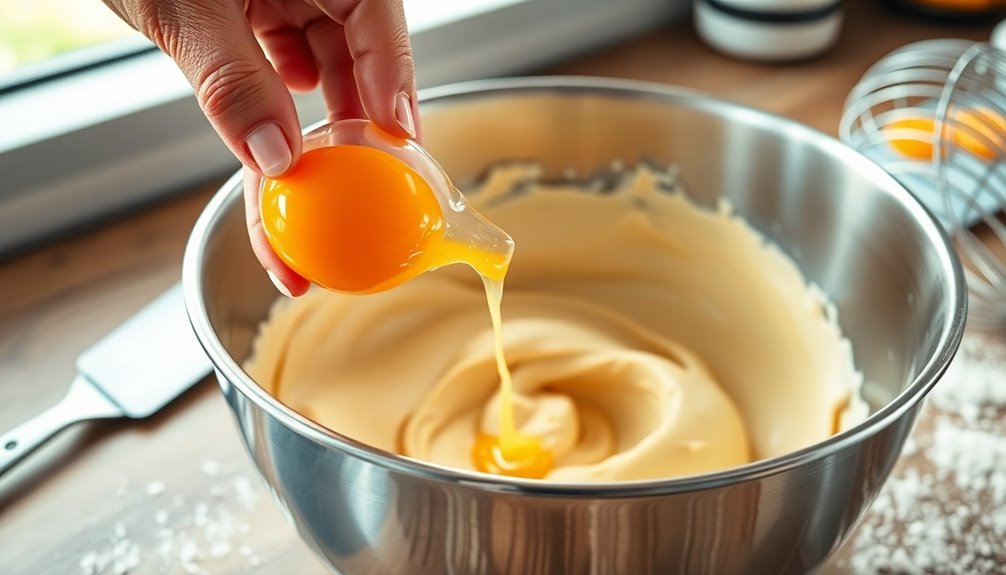
To create the perfect choux pastry, you need to add the eggs gradually while mixing well.
Start by adding one large egg at a time to your dough, mixing on medium-high speed until fully incorporated before introducing the next egg. This method ensures your mixture achieves the desired consistency—smooth and shiny.
If the dough feels too thick after the initial eggs, don't hesitate to incorporate an extra egg or yolk. The goal is for the mixture to fall from the spatula in a thick ribbon.
When you've reached that point, your choux pastry will be ready to be piped onto the baking sheet, holding its shape beautifully during baking.
Final Thoughts
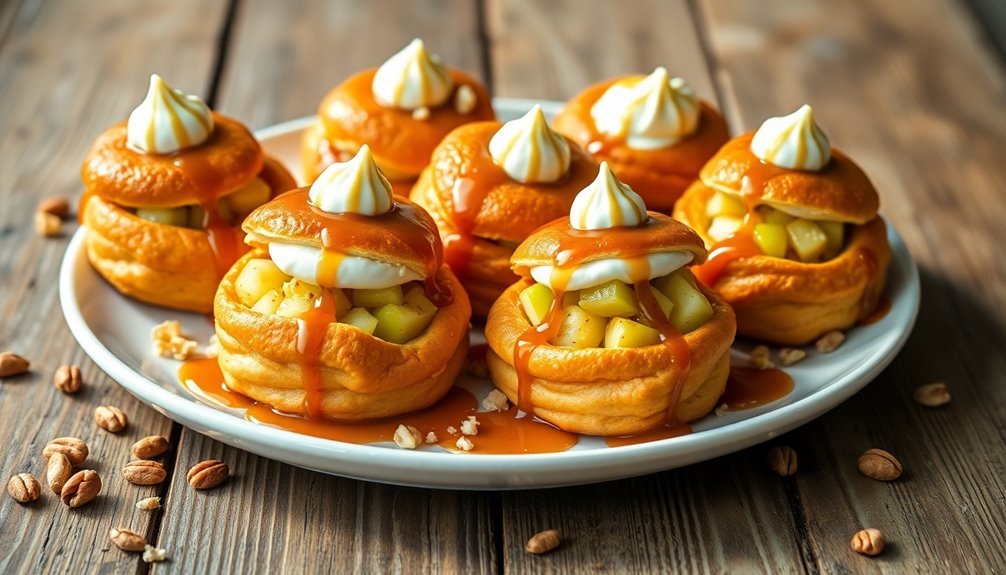
As you explore the delightful combination of apples and choux pastry, it's clear that this pairing brings a unique balance of flavors and textures to the table.
Using Granny Smith apples in your apple filling adds a crispness and tang that beautifully contrasts with the airy choux buns. The apple compote, enriched with brown sugar and a hint of cinnamon, enhances the overall experience. Additionally, incorporating celery juice into your recipe can provide a refreshing twist and boost the nutritional profile of your dessert. Chia seeds, known for their high fiber content, can also be sprinkled into the filling for added texture and health benefits.
To maintain texture, ensure the apples remain firm, creating that perfect bite. Drizzling a salted caramel sauce over your filled choux buns elevates both presentation and taste. Additionally, incorporating high fiber ingredients like chia seeds can complement the dish while promoting satiety.
Frequently Asked Questions
What Is the Secret to a Perfect Choux Pastry?
The secret to perfect choux pastry lies in precision. You need a 50-50 mixture of water and milk to butter for the right steam production.
Add eggs slowly, one at a time, making sure each one's fully incorporated before the next. Cook the dough over medium heat until a thin skin forms, and avoid opening the oven while baking to prevent collapse.
Start with a high temperature, then lower it for a crispy finish.
What Is Choux Pastry Filled With?
Choux pastry can be filled with a variety of delicious options, including creamy custards, fruity compotes, and rich whipped creams.
You might enjoy chocolate ganache, sweet pastry cream, or even a tangy lemon curd.
For a seasonal twist, consider adding spiced fillings or flavored creams that complement the pastry's lightness.
The beauty of choux pastry lies in its versatility, allowing you to experiment with both sweet and savory delights that cater to your taste.
What Is the Most Crucial Part in Baking Choux Pastry?
When you bake choux pastry, the most crucial part is ensuring the dough achieves the right consistency.
After adding eggs, it should be smooth and glossy to create the perfect puff and structure.
You also need to control the temperature carefully; start high to generate steam, then lower it for even cooking.
Remember, don't open the oven door too soon, as this can cause your pastry to deflate.
Measure ingredients accurately for the best results.
What Are the Faults When Making Choux Pastry?
Did you know that about 30% of home bakers face issues with choux pastry? If you're making it, watch out for common faults.
Insufficient cooking time can leave your pastry soggy, while overmixing after adding eggs often results in a thin batter that won't rise.
Also, ensure your oven's preheated to 400°F; otherwise, it won't puff up.
Lastly, remember to pipe evenly and poke holes to prevent steam from ruining that crisp texture.