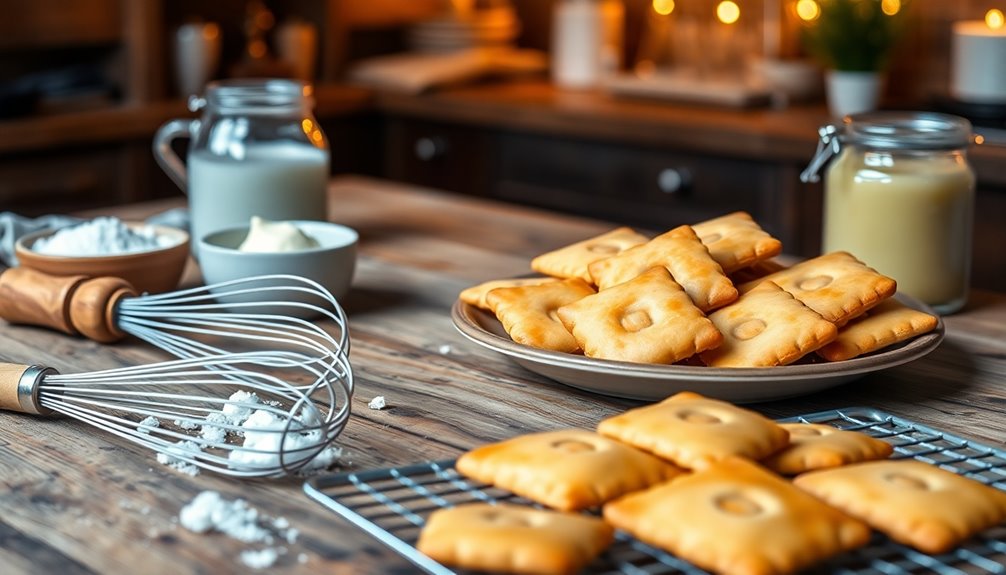

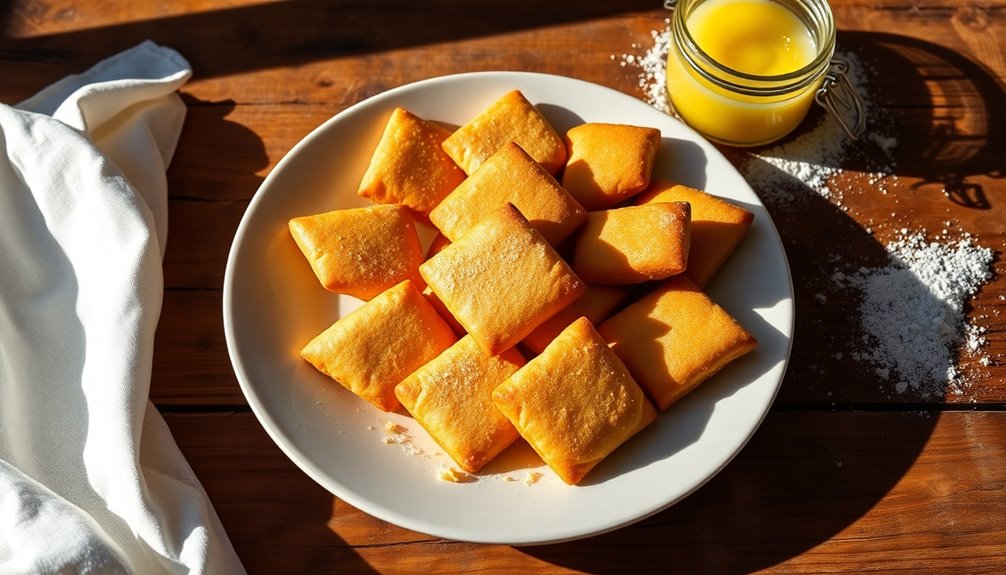
Cookies Lakomka, originating from Tula, Russia, delight with their unique shapes and flavors. Made from a mix of clarified butter, sugar, egg yolks, and cherry filling, these cookies reflect a rich culinary tradition. You'll find their intricate designs often symbolize local landmarks. Perfect for gatherings or personal treats, these cookies blend history and hospitality into every bite. Want to discover more about their baking techniques and cultural significance?
History

Cookies Lakomka, also known as Tula gingerbread, have a rich history that dates back to their origins in Tula, Russia.
These delightful treats, or Tula pryanik, are made from a unique blend of rye flour, honey, and spices. Traditionally, artisans crafted carved boards to imprint intricate designs onto each cookie, showcasing Tula's cultural heritage.
Tula pryanik, crafted from rye flour, honey, and spices, showcases intricate designs that celebrate Tula's rich cultural heritage.
You'd see patterns and symbols, including representations of the Tula Kremlin, making each Lakomka a unique piece of art. Originally shaped into diamond forms, these cookies reflect the historical significance of Russian baking techniques.
Today, while some designs are still hand-carved, many are created by professional artists, preserving the craftsmanship and cultural importance that make Lakomka a cherished symbol of Russian culinary art.
Recipe

The process of making Lakomka cookies is quite straightforward and can be enjoyed by both novice and experienced bakers. The use of clarified butter is essential, as it allows for higher baking temperatures without burning, which enhances the cookies' flavor and texture.
Whether you're baking for a gathering or just to satisfy your sweet tooth, this recipe is sure to impress.
Ingredients:
- 1 cup clarified butter
- 1 cup sugar
- 2 egg yolks
- 2 to 2.5 cups all-purpose flour
- 1 egg white (for brushing)
Cooking Instructions:
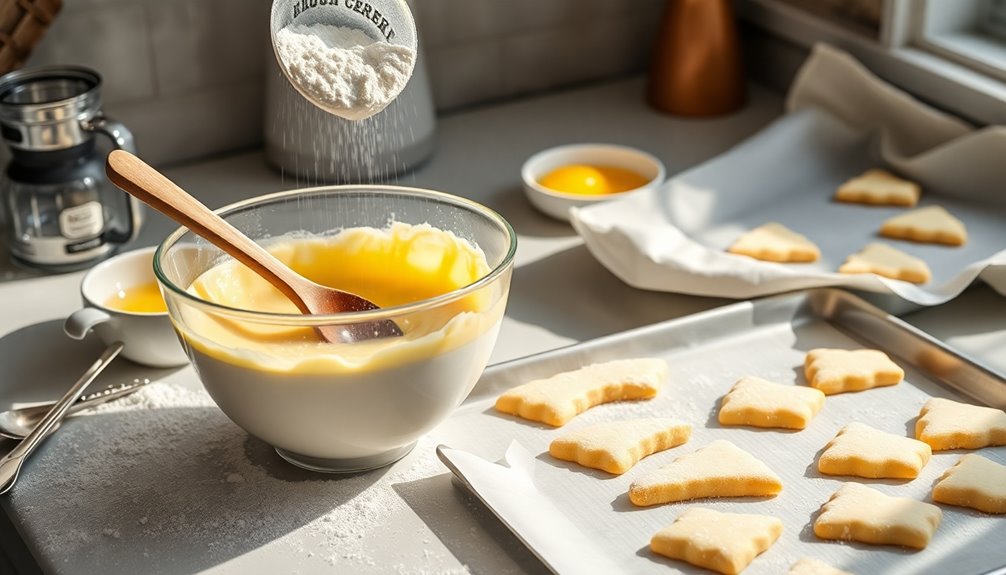
Begin by creaming together the clarified butter, sugar, and egg yolks in a mixing bowl until the mixture is creamy and well combined.
Gradually add the all-purpose flour, mixing until a dough forms that resembles pie dough. Press the dough evenly into a baking pan and brush the surface with egg white. Cut the dough into diamond shapes before placing it in the oven.
Bake the cookies at 350°F for the first 15 minutes, then reduce the temperature to 300°F and continue baking for an additional 30 to 40 minutes, or until the cookies are golden brown.
Extra Tips:
For best results, ensure your clarified butter is at room temperature before you start mixing; this helps to achieve a smooth and creamy texture.
Additionally, be careful not to overwork the dough when adding flour, as this can lead to tougher cookies. If you prefer a slightly sweeter taste, feel free to adjust the sugar to your liking.
Lastly, allow the cookies to cool completely in the pan before transferring them to a wire rack to ensure they maintain their shape.
Cooking Steps
To start making your Lakomka cookies, preheat your oven to 350°F.
Next, mix the ingredients thoroughly to get that perfect dough consistency.
Don't forget to add a generous amount of cherry filling for a delightful burst of flavor!
Step 1. Preheat the Oven to 350°F

Preheating your oven to 350°F (about 175°C) is essential for achieving perfectly baked cookies Lakomka. This temperature ensures even baking, helping you achieve that desired golden brown color.
To make sure your oven's accurate, use an oven thermometer; precision is key for the best cookie texture and flavor.
Before you place your baking trays inside, allow the oven to fully preheat. This step is crucial for achieving the right rise and crispiness in your cookies.
When you're ready to bake, position the trays on the middle rack for consistent heat circulation. Keep a close eye on the first batch, as it typically takes around 15 minutes to bake, preventing any chance of over-baking.
Happy baking!
Step 2. Mix Ingredients Thoroughly

Start by creaming together clarified butter, sugar, and egg yolk until you achieve a creamy, well-combined mixture. This step ensures even distribution of the ingredients, which is key for great texture.
Next, gradually incorporate the flour into the mixture. Use your hands to mix until the dough resembles pie dough consistency. Be careful not to over-mix, as this can disrupt the delicate balance of butter and lard, crucial for the final cookie texture.
Once you've formed the dough into a ball with a uniform consistency, it's ready to be pressed into a tray for baking. Remember, the goal is to mix just enough to combine all ingredients, ensuring your cookies turn out crispy and melt-in-your-mouth delicious.
Step 3. Add Cherry Filling Generously
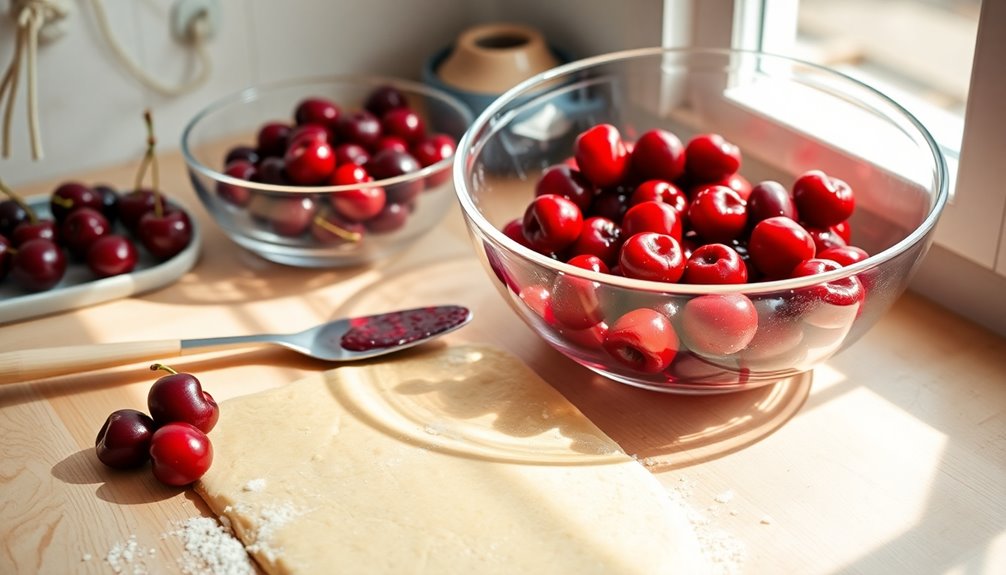
Adding the cherry filling is a crucial step in making your Lakomka cookies truly irresistible. Use a generous amount of cherry preserves or fresh cherries to create a rich, flavorful center between the two layers of dough.
Spread the filling evenly, leaving a small border around the edges to prevent any spillage during baking. Firmly press the edges together to seal in the cherry filling, ensuring it maintains its moisture and flavor. This technique also helps keep the cookies intact while they bake.
After they're done, consider glazing with sugar syrup and adding a light dusting of powdered sugar on top. This not only enhances the sweetness but also gives your cookies a beautiful finish that's hard to resist.
Step 4. Bake for 15 Minutes
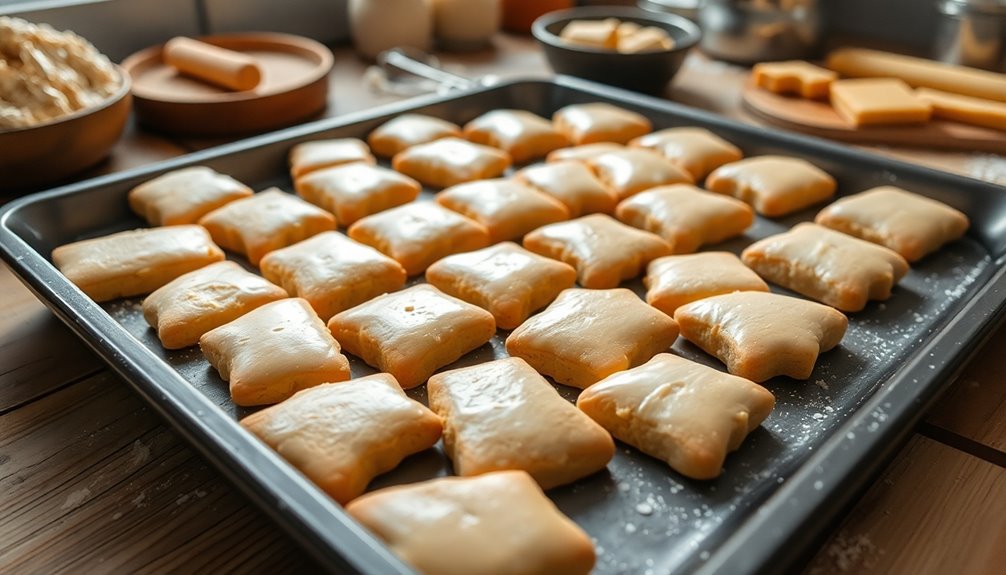
To achieve the perfect Lakomka cookies, bake them for 15 minutes at 350°F (175°C).
Before placing the cookies in the oven, make sure to preheat it to this temperature for optimal baking conditions.
Position two trays on levels 2 and 4 from the bottom, which helps with even heat distribution.
Keep an eye on the cookies during baking; you want them to develop a pale pink color while ensuring they remain white and don't over-bake.
After the initial 15 minutes, you'll reduce the temperature to 300°F (150°C) for an additional 30-40 minutes to achieve that golden brown finish.
This careful baking process is key to your Lakomka cookies' success!
Step 5. Cool on a Wire Rack

Once your Lakomka cookies have finished baking, it's crucial to transfer them to a wire rack for cooling.
This step helps maintain their crisp texture, ensuring you get that delightful crunch in every bite.
Place the wire rack in a well-ventilated area, allowing the cookies to cool for at least 10-15 minutes. This time is essential for them to firm up properly before you handle them.
Be sure not to stack the cookies while they're still warm; trapping steam can lead to sogginess.
Cooling on a wire rack is key to achieving the perfect consistency, preventing the bottoms from becoming overly soft or damp.
Enjoy the delightful crispness of your Lakomka cookies!
Final Thoughts
As you savor the rich flavors of Cookies Lakomka, it's clear why they hold a special place in Russian culinary tradition.
These delightful treats, especially the Lakomka w/ Cherry Filling, showcase the art of traditional baking with their unique shapes and textures. The use of clarified butter not only enhances their richness but also ensures a perfect bake.
When shared at gatherings or given as gifts, they become a symbol of warmth and hospitality. Remember, while they're best enjoyed fresh, proper storage is crucial to maintain their quality.
With each bite, you're not just tasting a cookie; you're experiencing a piece of cultural heritage that celebrates the love of food and togetherness.
Frequently Asked Questions
Can Cookies Lakomka Be Made Gluten-Free?
Absolutely, you can make cookies gluten-free! Start by substituting regular flour with a gluten-free blend or almond flour.
If the recipe calls for any leavening agents, ensure they're gluten-free as well.
Pay attention to other ingredients like chocolate chips or flavorings, making sure they don't contain gluten.
Experiment with different gluten-free options to find the texture and flavor you love.
You'll enjoy delicious cookies without worrying about gluten!
How Should I Store Leftover Cookies Lakomka?
To store leftover cookies, make sure they're completely cooled first.
Place them in an airtight container to keep them fresh. If you want to maintain their crunchiness, you can separate layers with parchment paper.
For longer storage, consider freezing them; just wrap each cookie tightly in plastic wrap before placing them in a freezer bag.
When you're ready to enjoy, simply thaw them at room temperature and savor the deliciousness!
Are There Any Common Substitutions for Ingredients?
When you're baking, the right ingredients can feel like magic, transforming simple dough into a cookie masterpiece.
If you find yourself short on an ingredient, don't worry! For flour, you can often substitute almond or oat flour. Instead of sugar, try honey or maple syrup for sweetness.
If you're out of eggs, use applesauce or mashed bananas. Get creative, and your delicious treats will still shine just as brightly!
How Long Do Cookies Lakomka Last?
When you've baked cookies, their shelf life can vary based on ingredients and storage conditions.
Typically, cookies last about a week at room temperature in an airtight container. If you refrigerate them, they can last up to two weeks.
For longer storage, consider freezing them; they'll retain their quality for up to three months. Just make sure to thaw them properly before enjoying your delicious treat again!
Can Cookies Lakomka Be Frozen?
Can you really extend the life of your favorite treats by freezing them? Absolutely!
Freezing cookies is a great way to preserve their freshness and flavor. Just make sure you let them cool completely before placing them in an airtight container or freezer bag.
When you're ready to indulge, simply thaw them at room temperature or pop them in the microwave for a few seconds.
Enjoy those delightful cookies whenever you crave them!