
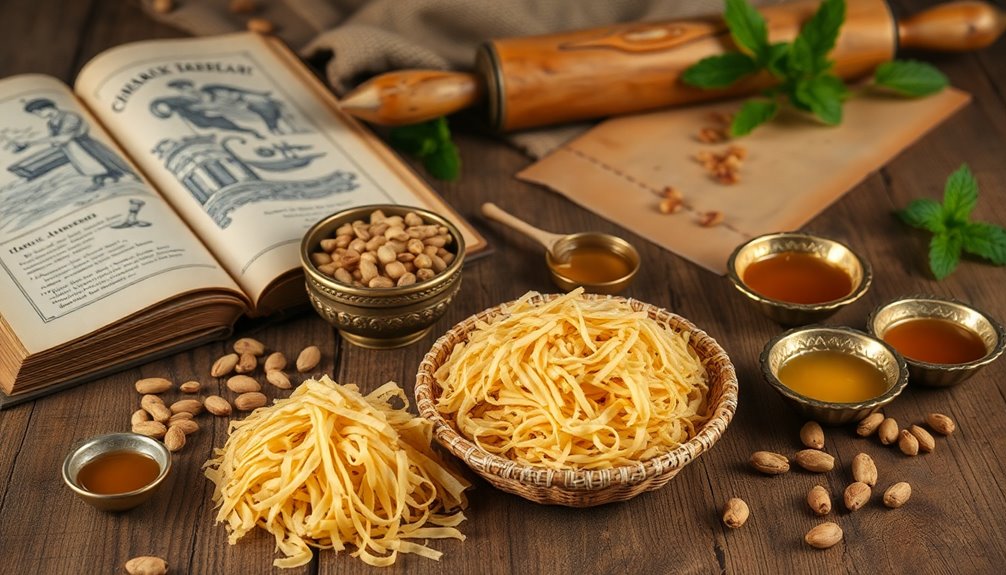
Kataifi dough is a versatile, thread-like pastry originating from the Ottoman Empire, perfect for both sweet and savory dishes. Made from simple ingredients like flour and cornstarch, its crispy strands can wrap around nut fillings or layer beautifully in desserts like baklava. You can create this dough at home, ensuring fresh flavors in every bite. Plus, you'll find tips and techniques to make the most of kataifi, enhancing your culinary adventures even further.
History
Kataifi dough, which you might know as shredded phyllo dough, has roots that trace back to the Ottoman Empire, making it a beloved staple in Middle Eastern and Greek cuisines.
The name "kataifi" comes from the Arabic word "kadaif," highlighting its fine, thread-like texture reminiscent of cobwebs.
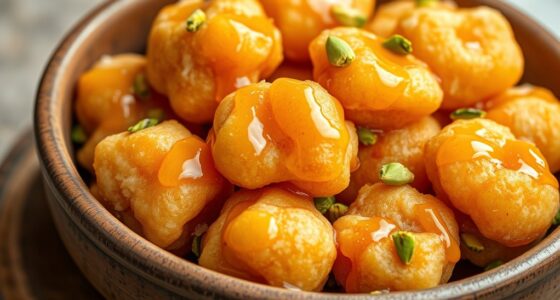
Traditionally, this dough is layered with nuts and spices, and often soaked in syrup, resulting in a sweet and crispy pastry that delights the palate.
Its versatility means you can use kataifi for both decadent desserts like baklava and savory dishes, adapting it to various culinary traditions.
Over time, kataifi has evolved, showcasing regional variations that reflect local ingredients and tastes, ensuring its enduring popularity in Middle Eastern pastry. This adaptability mirrors the way cultural influences shape culinary traditions across different regions.
Top picks for "kataifi dough"
Open Amazon search results for this keyword.
As an affiliate, we earn on qualifying purchases.
Recipe
Kataifi dough is a unique and versatile ingredient that can elevate a variety of dishes, particularly in Middle Eastern and Greek cuisine. This dough is characterized by its thin, noodle-like strands, which are perfect for layering in desserts or savory dishes.
Kataifi dough offers a delightful twist to dishes with its delicate, noodle-like strands, perfect for both sweet and savory creations.
Whether you're preparing a sweet treat like baklava or a savory dish like cheese-filled kataifi rolls, this recipe will guide you through making your own kataifi dough from scratch.
To get started, ensure you have all your ingredients ready and a non-stick pan preheated. The process of creating kataifi dough is relatively straightforward, but it requires some care to achieve the perfect crispy texture.
Once you've mastered the technique of dispensing the batter and cooking it to a golden brown, you'll find that this dough can be made in larger batches and stored for future use, making it a convenient addition to your culinary repertoire. Additionally, the use of aesthetic presentation can enhance the appeal of your kataifi dishes.
Ingredients
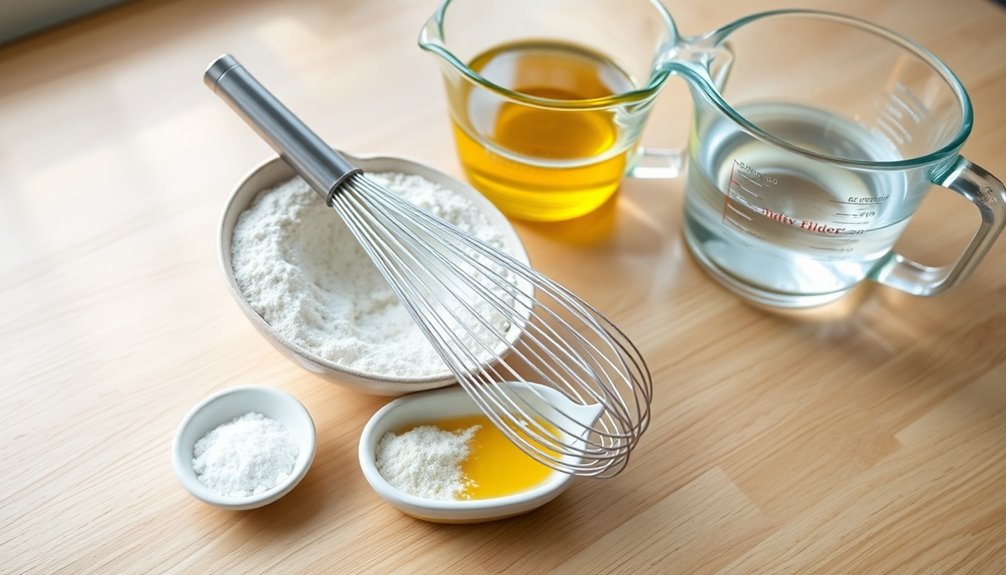
- 1 cup all-purpose flour
- 1/4 cup cornstarch
- 1/2 teaspoon salt
- 3 tablespoons vegetable oil
- 1 cup water
Instructions
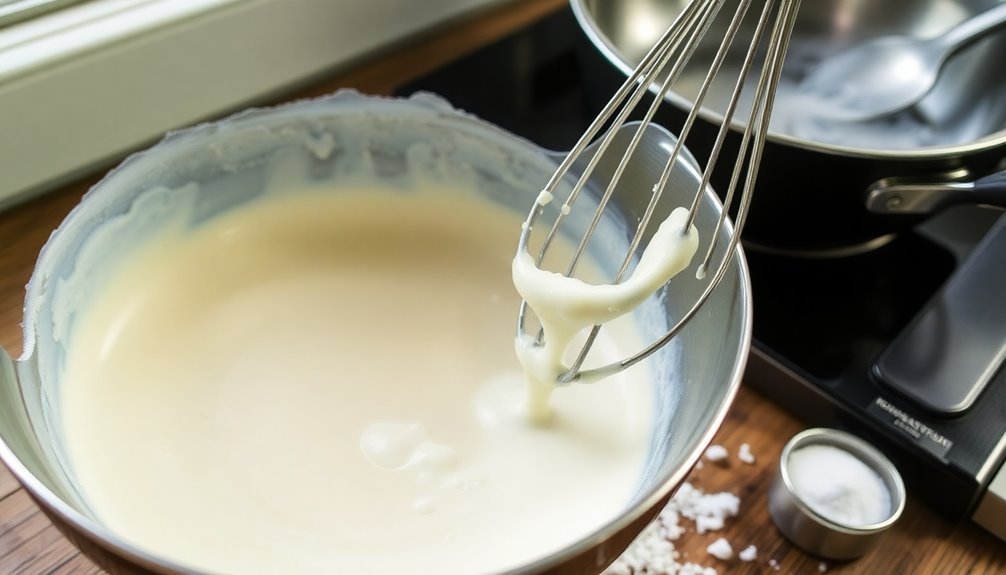
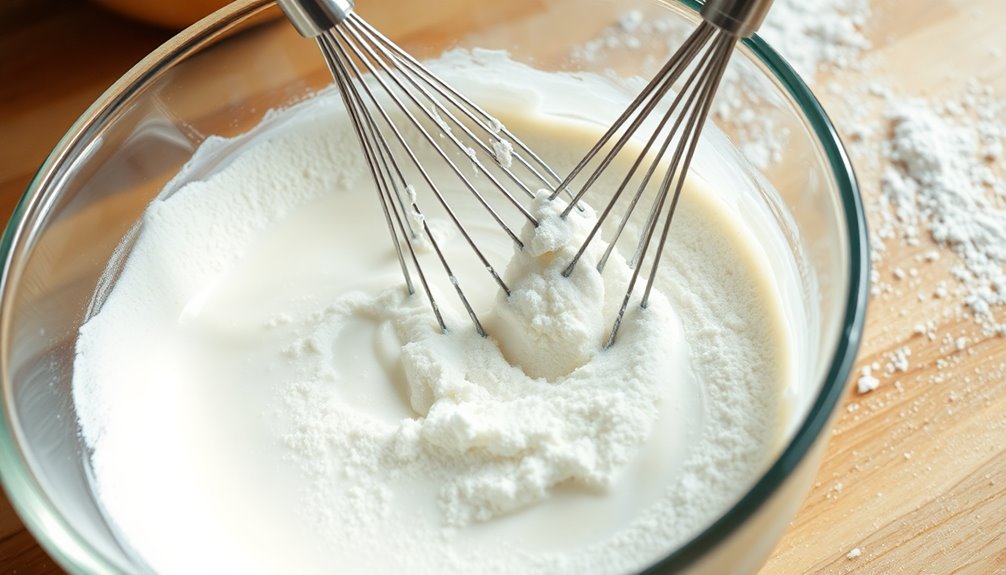
In a mixing bowl, combine the all-purpose flour, cornstarch, and salt. Gradually add the vegetable oil and water to the dry ingredients, whisking until the mixture is smooth and free of lumps.
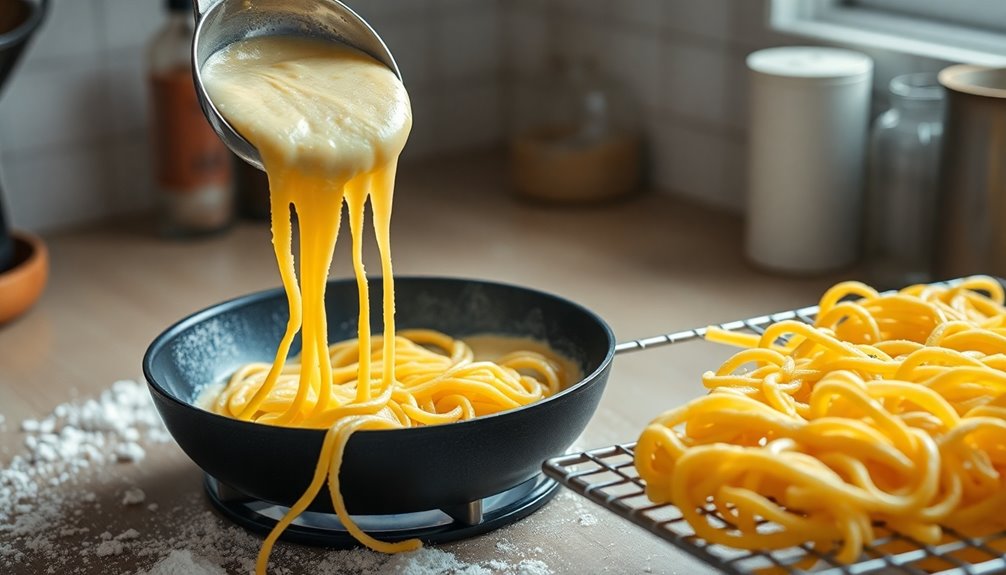
Preheat a non-stick pan over medium heat. Once hot, take a ladle of the batter and pour it into the pan while moving your wrist in a circular motion to create thin strands. Cook for about 2-3 minutes or until the strands are crispy and golden brown, then carefully remove them from the pan and let them cool on a wire rack.
Repeat the process with the remaining batter until all the dough is cooked.
Extra Tips
When making kataifi dough, it's essential to maintain an even heat in the pan to ensure uniform cooking of the strands. If you find that the dough is sticking to the pan, you can lightly grease it with additional vegetable oil before pouring in the batter.
Once cooked, kataifi dough can be frozen for later use; just ensure it's fully cooled before storing it in an airtight container. This will maintain its texture and allow you to enjoy kataifi dishes at your convenience.
Cooking Steps
To start making your kataifi dough, you'll first prepare the flour mixture by combining the ingredients.
Then, mix in the water until you achieve a smooth, elastic texture.
After letting it rest for 30 minutes, you can shape the strands for that perfect kataifi look. Additionally, ensure to rinse lentils beforehand if you plan to serve them alongside your kataifi for a nutritious meal.
Step 1. Prepare the Flour Mixture
Once you've gathered your ingredients, start by combining 220 grams of all-purpose flour, 160 grams of cornstarch, and 1 teaspoon of salt in a mixing bowl.
Whisk the dry mixture thoroughly to ensure the cornstarch and salt are evenly distributed for optimal dough texture.
Next, gradually add 2 tablespoons of vegetable oil, mixing continuously to incorporate it into the flour mixture.
Once well combined, slowly pour in 440 milliliters of water while whisking until you achieve a smooth and lump-free batter consistency.
For best results, strain the batter through a sieve to eliminate any remaining lumps.
This ensures you have a perfect mixture ready to transfer to a piping bag for cooking your kataifi dough. Additionally, proper storage of your dough will help maintain its quality and prevent spoilage.
Step 2. Mix Water and Flour
With your flour mixture ready, the next step involves mixing the water and flour to create the kataifi dough.
Start by combining approximately 220 grams of all-purpose flour with 440 ml of water in a mixing bowl. Whisk the ingredients thoroughly until the mixture is smooth and lump-free. You can use a hand blender or a whisk for this task.
To enhance the dough's texture and flavor, add 2 tablespoons of vegetable oil and 1 teaspoon of sea salt.
After mixing, strain the batter through a sieve to eliminate any lumps, then transfer it to a piping bag for easy dispensing. Additionally, the use of plant-based alternatives in various recipes highlights the growing trend towards healthier cooking options.
Step 3. Knead Until Smooth and Elastic
Knead the dough gently until it becomes smooth and elastic, ensuring it's well-prepared for shaping into kataifi strands.
Start by combining all-purpose flour, cornstarch, sea salt, and vegetable oil in a mixing bowl. Gradually add water to this mixture while whisking continuously until the batter is lump-free.
Once you achieve a smooth consistency, strain the batter through a sieve to eliminate any remaining lumps, allowing for a fine texture.
After mixing, transfer the smooth batter into a squeeze bottle or piping bag for easy dispensing.
Finally, give the dough a light knead to enhance its elasticity and texture, making it perfect for creating delicate kataifi pastry. Utilizing high-quality equipment can significantly improve the overall texture and presentation of your final dish.
Enjoy the process and get ready to make those beautiful strands!
Step 4. Rest for 30 Minutes

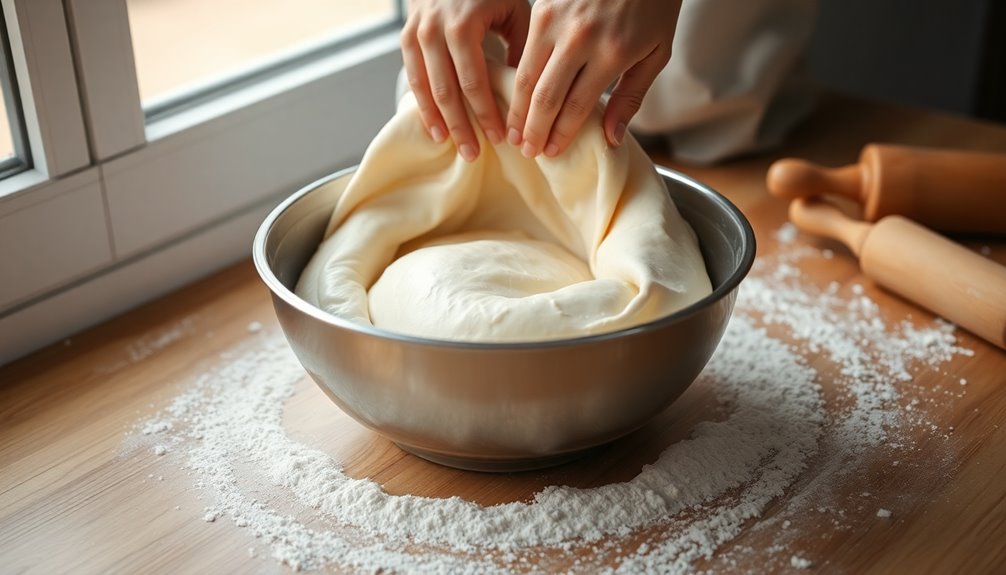
After you've prepared the kataifi dough, letting it rest for 30 minutes is essential for achieving the perfect texture. This resting period allows the gluten to relax, making the dough easier to pipe while preventing tough strands during cooking.
As the batter rests, it thickens slightly, helping you achieve the desired consistency for those delicate strands. Be sure to cover the batter with a damp cloth, which keeps it pliable and prevents drying out. This crucial step contributes to a lighter, airier final product. Additionally, just as contrast ratios enhance image quality in projectors, allowing your dough to rest improves the overall texture of your kataifi.
Once the 30 minutes are up, give the batter a brief re-whisk to ensure an even consistency before you move on to the next steps in shaping your kataifi strands.
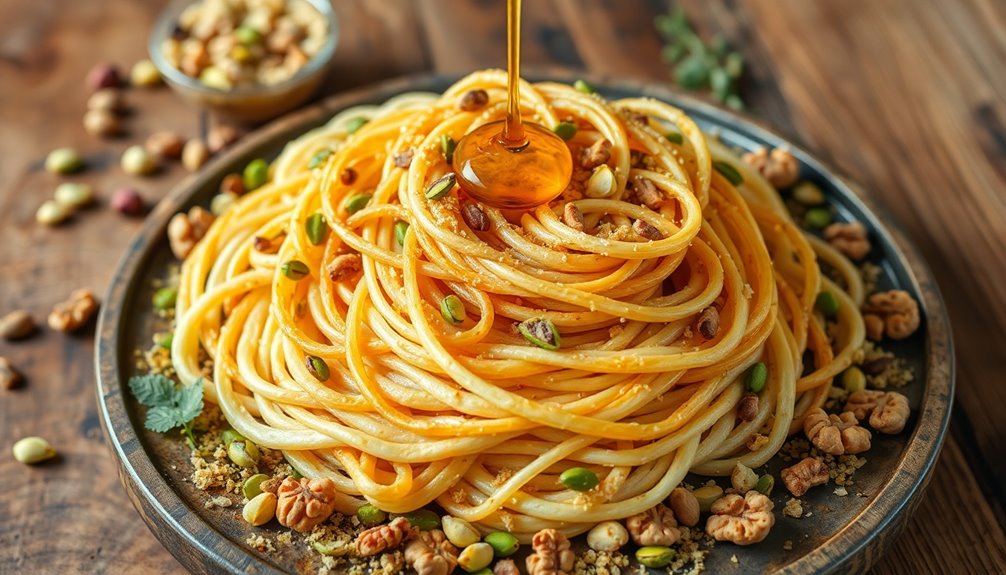
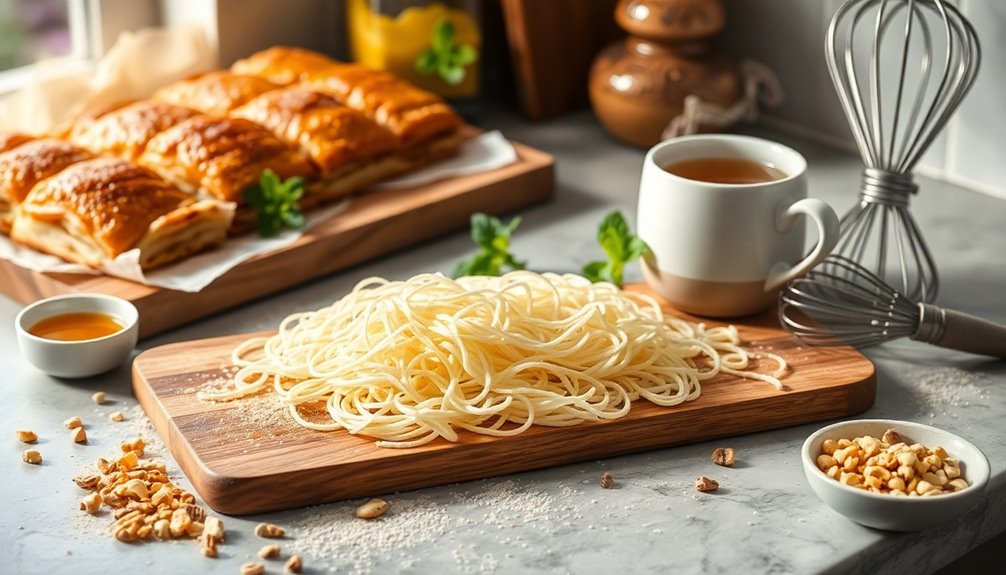
Step 5. Shape the Kataifi Strands

To shape the kataifi strands, start by whisking together your batter of flour, cornstarch, salt, oil, and water until it's smooth and lump-free.
Next, use a piping bag fitted with a small round tip to dispense the batter onto a preheated non-stick pan in a zig-zag motion. This creates fine kataifi strands. Aim for a thin and even layer to ensure they cook uniformly and achieve that desired crispy texture.
Cook the strands for about 20-30 seconds until they begin to lift from the pan; adjust the heat if they brown too quickly.
Once cooked, cover them with a tea towel to prevent drying out while you repeat the process with the remaining batter.
This method of shaping resembles the technique used in bread pudding, where transforming ingredients leads to a delightful dessert.
Enjoy your kataifi!
Final Thoughts
While experimenting with kataifi dough, you'll discover its incredible versatility and the delightful textures it adds to your favorite dishes. This simple dough, made from all-purpose flour, cornstarch, and a few other ingredients, allows you to create crispy strands that enhance both sweet and savory recipes.
You can use these strands to wrap nut fillings for a delicious baklava or even explore innovative savory options. Homemade kataifi gives you a cost-effective, customizable alternative to store-bought versions, ensuring fresh flavors in every bite.
Plus, you can make it in advance and freeze it for future use, making your culinary adventures even more convenient. Embrace the unique qualities of kataifi, and elevate your cooking with this remarkable dough. Additionally, consider pairing your kataifi dishes with a refreshing drink like freshly squeezed juices to complement the flavors and enhance your dining experience.
Frequently Asked Questions
What Is Kataifi Made Of?
When you're curious about what a specific dough is made of, you'll often find a combination of key ingredients.
Typically, it includes all-purpose flour for structure, with cornstarch added for a crispy texture.
You'll also want a pinch of sea salt for flavor, vegetable oil to ensure it's flaky, and water to achieve the right consistency.
Each component plays an important role in creating the perfect dough you're looking for.
Is Phyllo Dough the Same as Kataifi?
Did you know that phyllo dough can be stretched to over 1,000 times its original size?
While phyllo and kataifi may seem similar, they're not the same. Phyllo consists of thin, layered sheets, creating a flaky texture in dishes.
In contrast, kataifi is made of fine strands, giving it a crispier, airier quality.
Each dough has unique applications, so you'll want to choose based on the specific texture and flavor you're aiming for in your dish.
What Is a Substitute for Kataifi Dough?
If you're looking for a substitute for that unique dough, try using shredded phyllo pastry.
It'll give you a similar texture, though it mightn't replicate the fine strands perfectly.
For a gluten-free option, finely shredded coconut or gluten-free pasta works, but expect a flavor shift.
You could also use thinly sliced crepes for a layered effect.
Just remember to adjust cooking times, as different ingredients may require various methods for crispiness.
Is Kataifi Pastry the Same as Vermicelli?
No, kataifi pastry isn't the same as vermicelli.
While both are thin, noodle-like products, you'll find that kataifi's texture is more delicate and airy, perfect for desserts.
Vermicelli, on the other hand, is usually made from rice or wheat flour and often used in savory dishes like soups or stir-fries.
Conclusion
In conclusion, kataifi dough is a delightful ingredient that can elevate your desserts to new heights. Remember, "the proof of the pudding is in the eating." So, don't hesitate to experiment and create your own sweet masterpieces. Whether you're wrapping it around nuts or drenching it in syrup, you're sure to impress your family and friends. Dive into this delicious tradition, and you'll find that the joy of making kataifi is just as rewarding as enjoying it!