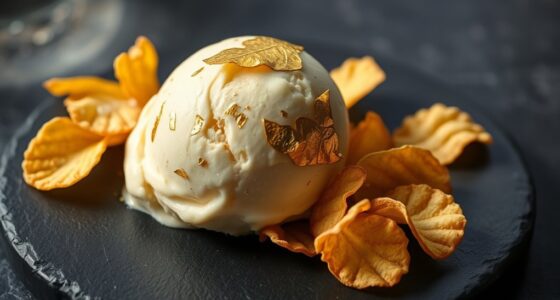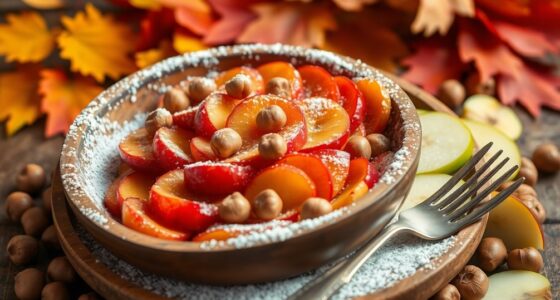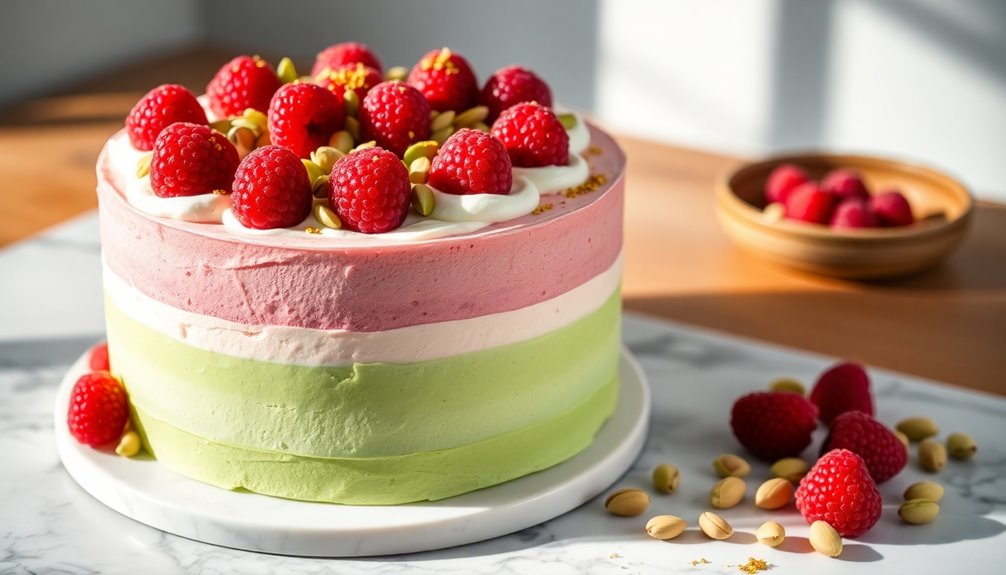

Raspberry pistachio mousse cake is a stunning dessert that balances the nutty flavor of pistachios with the tartness of fresh raspberries. This beautiful layered treat features a pistachio crust and a light, airy mousse, making it perfect for celebrations. You'll love the vibrant presentation and harmonious blend of flavors in each bite. With some simple steps and techniques, you can create this showstopper dessert that will impress your guests and elevate your next occasion.
History

Mousse has quite an intriguing history that dates back to the 18th century in France. Originally, it was a savory dish, but it eventually transformed into the beloved sweet dessert you know today. Airless sprayers, often used for achieving smooth finishes, have similarly evolved to enhance culinary presentations. The evolution of mousse is paralleled by advancements in home security systems, which have also seen remarkable changes over the years. By the 20th century, mousse cakes, like the raspberry pistachio variety, became popular with the introduction of whipped cream and gelatin, which allowed for lighter textures and stunning presentations. The combination of raspberry and pistachio showcases the modern pastry trend of pairing nutty and fruity flavors for a balanced taste. Additionally, the art of interior design has influenced the presentation of desserts, as beautifully styled plates and environments elevate the dining experience.
French patisserie techniques, emphasizing layered components like sponge and mousse, have shaped mousse cakes worldwide. Their aesthetic appeal, often adorned with fresh fruits, made them a go-to choice for special occasions and festive celebrations.

Professional 3D Pistachio Mousse Cake Mold – Premium Food-Grade Silicone Baking Tool for Viral Fruit-Shaped Pastries,6-Cavity, 3.4 oz per Cavity, for Mousse, Entremets and Chocolate Work Desserts
- Realistic Pistachio Design: Intricate surface textures mimic real pistachios
- Food-Grade Silicone Material: BPA-free, heat and cold resistant silicone
- Six Precision Cavities: Each holds 3.4 oz for perfect portions
As an affiliate, we earn on qualifying purchases.
As an affiliate, we earn on qualifying purchases.
Recipe
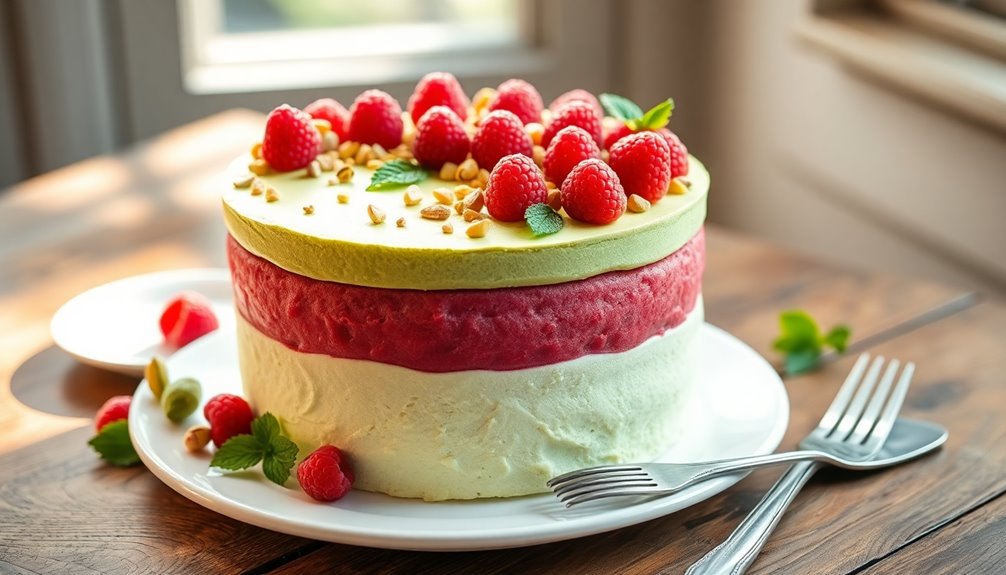
Indulge in the decadent layers of the Raspberry Pistachio Mousse Cake, where the nutty essence of pistachios meets the vibrant tartness of fresh raspberries. This visually stunning dessert not only captivates the eye with its rich green, white, and red hues but also delights the palate with its harmonious blend of flavors and light textures. A playful dessert like this one is sure to bring joy to any occasion. High refresh rates can also enhance the overall experience of enjoying desserts at a gathering, making it a perfect complement to a fun atmosphere.
Perfect for festive celebrations, this cake promises to be a showstopper on any dessert table. Additionally, the use of cacao's health benefits in desserts can enhance the overall indulgence by promoting mood enhancement. Bread pudding is another example of how ingredients can be transformed into delightful treats, offering a comforting experience.
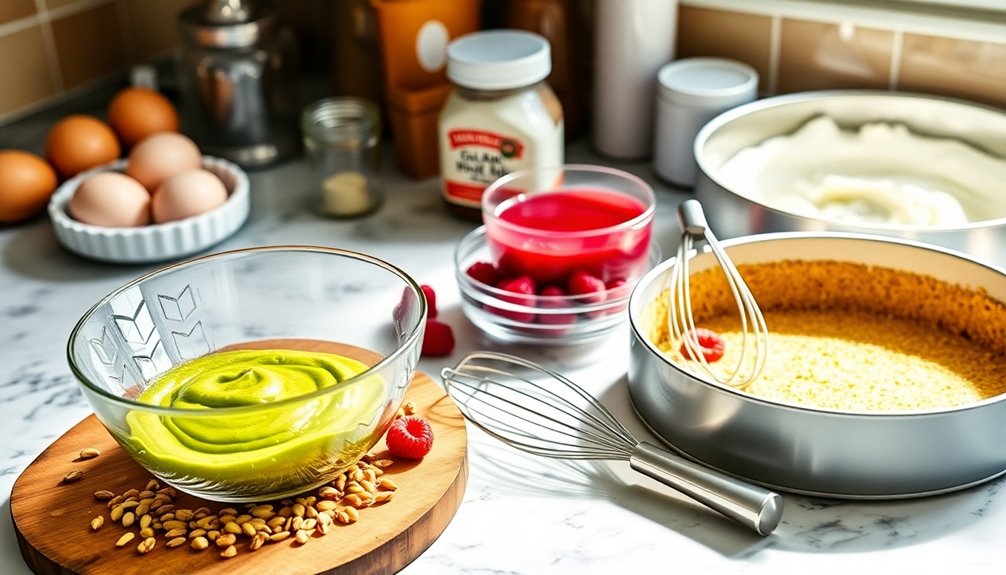
To create this delicious cake, you'll begin by preparing a graham cracker crust that serves as a sturdy base for the layered mousses. The pistachio sponge will then be baked to a light and fluffy perfection, followed by the meticulous layering of the pistachio and raspberry mousses.
After assembling the cake, it will need to chill for several hours, allowing the flavors to meld and the textures to set. Get ready to impress your guests with this delightful treat!
Ingredients:
- 1 cup graham cracker crumbs
- 1/4 cup unsalted butter, melted
- 1/2 cup toasted pistachios, finely ground
- 3 large eggs, separated
- 1/2 cup granulated sugar
- 1/2 cup heavy cream
- 1 cup pistachio paste
- 1 cup fresh raspberries
- 1/2 cup raspberry puree
- 1 tablespoon gelatin
- 1/4 cup cold water
- Pinch of salt
Instructions:
Begin by preheating your oven to 350°F (175°C). In a mixing bowl, combine graham cracker crumbs and melted butter until well blended, then press this mixture into the bottom of a springform pan to form the crust.
Bake for about 10 minutes and allow it to cool. In another bowl, whisk egg yolks, sugar, and pistachio paste until creamy. In a separate bowl, beat the egg whites until stiff peaks form and gently fold them into the yolk mixture.
Prepare the gelatin by dissolving it in cold water and allowing it to bloom before incorporating it into the pistachio mousse mixture. For the raspberry mousse, whip the heavy cream to soft peaks, then gently fold in raspberry puree and the bloomed gelatin.
Layer the cooled pistachio sponge, pistachio mousse, fresh raspberries, and raspberry mousse in the springform pan, then refrigerate for 4-6 hours or overnight until set.
Extra Tips:
For the best results, ensure that all ingredients are at room temperature before you begin mixing. This will help achieve a smoother batter and mousse.
When layering the mousses, take your time to pour them gently to maintain distinct layers. You can also garnish the top with additional fresh raspberries and chopped pistachios for a delightful presentation.
If desired, consider using a food processor to finely grind the pistachios for an even texture, and remember that allowing the cake to set overnight will enhance its flavor significantly.
Enjoy your Raspberry Pistachio Mousse Cake!
Cooking Steps

To create your Raspberry Pistachio Mousse Cake, you'll start by preparing the pistachio crust base.
Next, blend the raspberry puree mixture and chill the mousse thoroughly to ensure a light texture. Churning ice cream can create a similarly airy consistency in desserts.
Layer the mousse with raspberry sauce for a stunning finish, then garnish with crushed pistachios for that perfect touch. Including whole foods in your dessert can enhance its nutritional value and make it a more balanced treat.
Step 1. Prepare Pistachio Crust Base

Start by toasting 1 ⅔ cups of raw pistachios at 300°F (150°C) for 10 minutes to bring out their rich flavor.
In a mixing bowl, combine 1 ½ cups of graham cracker crumbs, ¼ cup of granulated sugar, and the finely ground pistachios to create a nutty crust mixture.
Melt ½ cup of unsalted butter and stir it into the dry ingredients until the texture resembles wet sand, ensuring better binding.
Firmly press this mixture into the bottom of a cake pan to form an even crust layer. Make sure it holds together well.
Finally, chill in the fridge for at least 20 minutes to set before layering your mousse for the pistachio cake.
Step 2. Blend Raspberry Puree Mixture

With the pistachio crust set and ready, you can now focus on preparing the raspberry puree mixture.
Start by heating the raspberry puree with caster sugar until the sugar dissolves completely, balancing the sweetness. Soften gelatin sheets in iced water, then mix them into the warm raspberry mixture to stabilize the mousse.
Once the gelatin dissolves, let the mixture cool slightly before adding yogurt to enhance the creaminess.
Next, whip heavy cream until it thickens, then gently fold it into the raspberry yogurt mixture to maintain a light texture.
Finally, pour the blended raspberry mousse into mold rings, smoothing the top before chilling until set, typically for several hours or until firm.
Enjoy the anticipation!
Step 3. Chill Mousse Mixture Thoroughly

Once the raspberry mousse mixture has cooled to room temperature, it's time to chill it thoroughly.
Pour the raspberry mousse into molds, smoothing the tops with an offset spatula for an even texture. Place it in the fridge and chill for at least 2 hours until completely set.
While that's chilling, do the same with the pistachio mousse, ensuring it also cools to room temperature before pouring it into molds. Chill the pistachio mousse for a minimum of 4 hours or until firm.
Once both mousse mixtures are set, carefully demold each layer. For optimal texture, chill the assembled mousse cake for an additional 30 minutes before serving.
Enjoy the delightful layers of raspberry and pistachio!
Step 4. Layer Mousse With Raspberry Sauce

Now that you've chilled the mousse layers to perfection, it's time to layer them with the raspberry sauce for an added burst of flavor.
Start by preparing the raspberry sauce; heat fresh raspberries with sugar until they break down, then strain to remove the seeds for a smooth consistency.
Once your raspberry mousse is set, gently slice fresh raspberries and arrange them along the sides of the mousse for added texture.
Next, layer the raspberry sauce over the set pistachio mousse, creating a beautiful contrast.
Carefully pipe or pour the raspberry mousse over the pistachio layer to maintain distinct layers.
Chill the assembled cake in the refrigerator for 4-6 hours, allowing the flavors to meld before serving.
Enjoy!
Step 5. Garnish With Crushed Pistachios

To garnish your raspberry pistachio mousse cake, start by ensuring the mousse is completely set in the refrigerator.
Next, grab a food processor and finely crush some pistachios. This will create a textured topping that contrasts beautifully with the smooth mousse.
Just before serving, lightly sprinkle the crushed pistachios over the top of the chilled cake to maintain their crunchiness and vibrant green color.
For an extra touch, mix in a few freeze-dried raspberries with the crushed pistachios to enhance both the color and flavor.
To achieve a clean and elegant finish, use a fine sieve to evenly distribute the garnish, preventing any clumps.
Your mousse cake will look as good as it tastes!
Final Thoughts
As you savor the raspberry pistachio mousse cake, you'll appreciate the harmonious blend of flavors and textures that make this dessert truly special.
The nutty essence of homemade pistachio paste pairs beautifully with the tartness of fresh raspberries on top, creating a vibrant and festive treat. Each layer, from the pistachio sponge to the raspberry jelly, is crafted to ensure a rich yet refreshing experience.
The delightful combination of homemade pistachio paste and fresh raspberries creates a vibrant, festive dessert experience in every layer.
The light mousse, enhanced by whipped cream and a sprinkle of powdered sugar, elevates the cake's overall appeal. Topped with chopped pistachios, this mousse cake becomes a stunning centerpiece for any occasion.
Remember to chill it for several hours, allowing the flavors to meld and the textures to set before indulging in this exquisite dessert.
Frequently Asked Questions
Can I Substitute Other Nuts for Pistachios?
Why not experiment with different nuts? You can definitely substitute other nuts for pistachios in your recipes!
Almonds, walnuts, or hazelnuts can add their unique flavors and textures. Just keep in mind that each nut has its own taste profile, which might change the dish's overall character.
How Should I Store Leftover Mousse Cake?
To store leftover mousse cake, you should cover it tightly with plastic wrap or aluminum foil to prevent it from drying out.
If you have an airtight container, that works even better! Keep it in the refrigerator for up to three days.
If you want to keep it longer, consider freezing individual slices.
Just remember to wrap them securely to maintain freshness, and let them thaw in the fridge when you're ready to enjoy!
Is This Cake Suitable for Gluten-Free Diets?
Yes, this cake can be suitable for gluten-free diets, but it depends on the ingredients used.
You'll want to ensure that any flour or crust included is gluten-free. If you're making it yourself, substitute regular flour with a gluten-free blend.
Always check labels on pre-made ingredients to confirm they're gluten-free. If you're unsure, it's best to consult with your guests or the recipe creator to ensure everyone can enjoy it safely.
Can I Make This Cake Ahead of Time?
Making this cake ahead of time is like preparing for a big celebration—planning helps everything come together smoothly.
You can definitely make it in advance! Just store it in the fridge, and it'll stay fresh for a few days.
If you're using a mousse layer, consider assembling it closer to serving time for the best texture.
Just remember to let it sit at room temperature briefly before serving for optimal flavor.
Enjoy!
What Tools Do I Need to Make This Cake?
To make this cake, you'll need a few essential tools.
Grab a mixing bowl for combining your ingredients, a whisk or electric mixer for blending, and a rubber spatula for scraping down the sides.
You'll also want a cake pan to bake it in and parchment paper to line the pan for easy removal.
Lastly, don't forget a thermometer to ensure your cake is perfectly baked!
With these tools, you're all set to get started.