
TL;DR

Get kitchen staples and gadgets delivered free with Prime
- Fast, free delivery on millions of items
- Prime Video, Amazon Music and more included
- Member-only deals all year
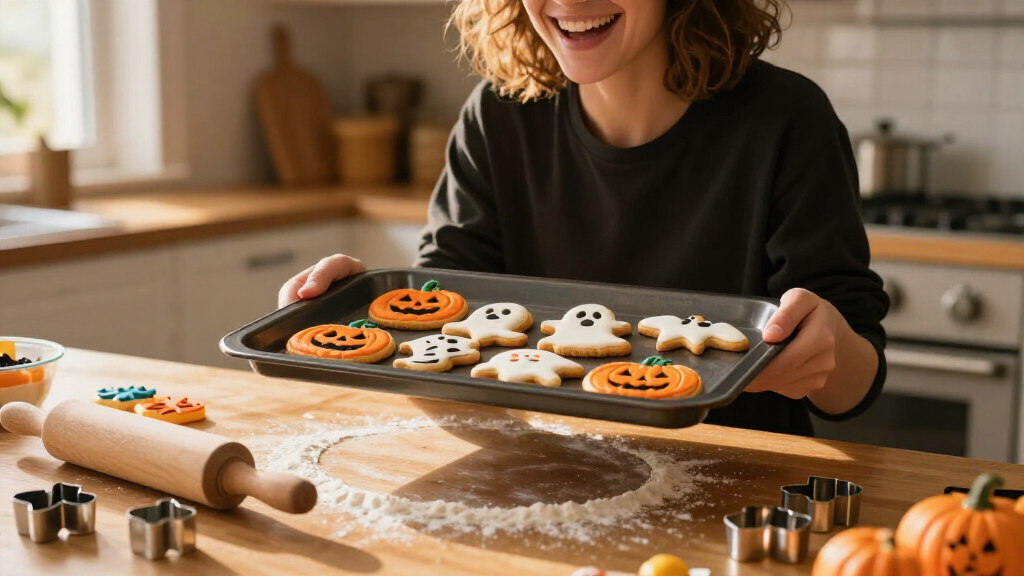
Spooky Halloween cookie cutters transform simple dough into haunting shapes like ghosts, skulls, and bats. They make decorating easier and baking more fun—perfect for parties, kids, and themed gatherings.
Halloween isn’t just about costumes and candy anymore. It’s about transforming your kitchen into a haunted house of treats. Spooky Halloween cookie cutters turn plain dough into eerie shapes — pumpkins, ghosts, bats — that instantly scream ‘festive fun.’
Whether you’re baking with kids, prepping for a party, or just want to add a dash of creepy charm to your desserts, these cutters are your secret weapon. In this article, you’ll learn how to pick the perfect set, use them like a pro, and avoid common pitfalls. Ready to make your treats the talk of the town?
Choose sturdy, sharp-edged metal cutters for clean cuts and detailed shapes.
Chill your dough and cutouts to prevent spreading and preserve intricate designs.
Use a light dusting of flour to prevent sticking without drying out your dough.
Store cutters flat and dry to maintain their shape and sharpness over time.
Look for multi-piece sets and embossing options to add depth and detail to your spooky treats.
Why Spooky Halloween Cookie Cutters Make Your Treats Pop
Spooky Halloween cookie cutters do more than shape dough. They turn a simple sugar cookie into a visual centerpiece. Imagine a flat, plain cookie — then imagine it outlined with a haunted house or a grinning skull. The contrast is striking.
They’re especially useful for themed parties because they instantly communicate the mood. A ghost, a pumpkin, or a bat — these shapes are recognizable even from across the room. Plus, they make decorating easier. A quick icing or dusting with colored sugar and your cookie jumps from basic to spooky.
Think about a Halloween bake sale. A batch of pumpkin-shaped cookies with tiny icing stems looks adorable, but a tray of assorted haunted house and skeleton cookies? That’s eye-catching. They also foster fun group activities, like family baking nights or classroom parties. Everyone loves pressing out dough and revealing these creepy shapes.
However, they do have limits. Intricate designs or narrow sections can be tricky to handle. A ghost with tiny eyes or a spider web might lose detail in the oven or stick to the cutter. The key is to choose shapes and materials wisely.
As an affiliate, we earn on qualifying purchases.
Choosing the Right Material and Design for Your Halloween Cookies
The material of your cookie cutter impacts how well it performs and how easy it is to clean. Common choices include stainless steel, tin-plated steel, and plastic. Metal cutters tend to have sharper edges, making clean cuts in chilled dough a breeze. Plastic cutters are often safer, especially for kids, and can include embossing details for extra spookiness.
For a crisp, professional look, stainless steel is your best bet. It’s durable, dishwasher-safe, and holds its shape. Tin-plated steel is cheaper but can rust if not dried properly. Plastic cutters are lightweight, safe, and often come with fun textures or embossed faces, perfect for adding extra detail.
When picking shapes, consider the complexity. Simple outlines like pumpkins or bats are easier to cut and release. Intricate shapes with narrow sections — think tiny spiders or detailed haunted houses — may require patience and a gentle touch. Check product care instructions before buying, especially if you want to wash them frequently.
Design-wise, sets that include multiple shapes and sizes boost versatility. Some cutters come paired with embossers or stamps, allowing you to add details after cutting. For example, a ghost cutter with a separate face embosser creates a spooky smile without extra icing work.
Latest Trends in Halloween Cookie Cutter Designs
The world of spooky cookie cutters is constantly evolving, driven by trends in Halloween decor and pop culture. Right now, you’ll see a mix of cute and creepy styles. Smiling ghosts and playful pumpkins are popular among families, while goth-inspired skulls, spiders, and haunted mansions appeal to more grown-up tastes.
Multi-piece sets are trending, letting you assemble complex scenes like haunted houses with bats flying above or skeletons dancing. Reusable silicone cutters are gaining popularity because they’re flexible and easy to clean. Some brands now offer eco-friendly options made from recycled materials, appealing to environmentally conscious bakers.
Design-wise, look for cutters that combine multiple shapes or include embossing features. These allow you to create layered, textured cookies that look like little Halloween dioramas. For example, a pumpkin cutter with an embossing tool can give your cookies a carved face, adding depth without extra decorating.
Keep an eye on social media and baking blogs for the latest styles. Every year, new trends emerge—like spooky witches’ hats or creepy crawly spiders—that can inspire your baking projects.
How to Use Spooky Halloween Cookie Cutters Without Fails
Using cookie cutters properly is the secret to perfect shapes every time. Here’s a step-by-step guide:
- Chill your dough. Cold dough holds its shape better. Wrap it in plastic and refrigerate for at least 30 minutes before rolling.
- Lightly flour the surface and cutter. This prevents sticking. Don’t overdo it — too much flour can dry out the dough.
- Roll the dough evenly. About 1/4 inch thick is ideal. Thinner cookies may burn, while thicker ones can be chewy.
- Press straight down. Avoid twisting; a firm, straight press helps keep the shape intact. For delicate shapes, work gently.
- Refrigerate or freeze the cutouts. Before baking, chill the shapes for 10-15 minutes. This prevents spreading and preserves detail.
- Bake at the right temperature. Usually 350°F (175°C). Keep an eye on them; overbaking causes loss of shape.
- Carefully transfer cookies to cooling racks. Use a thin spatula or offset spatula to avoid breaking shapes.
For example, a friend once made a batch of haunted house cookies. She chilled her dough, pressed out the shapes carefully, and froze them before baking. The result? Crisp edges and spooky details that everyone admired.
Remember: patience and prep are your best friends when working with spooky cookie cutters.
Cleaning and Storing Your Spooky Cookie Cutters: Keep Them Sharp and Ready
Proper cleaning and storage prolong the life of your cookie cutters and keep them safe to use. Metal cutters should be washed with warm, soapy water immediately after use. Use a soft brush or cloth to remove dough bits from intricate designs. Dry thoroughly to prevent rust, especially if they aren’t dishwasher-safe.
Plastic cutters can often go into the dishwasher, but check manufacturer instructions first. Hand-washing and air-drying are safest for preserving embossed details.
Store cutters flat in a container or hang them in a dedicated baking drawer. Keep them separated to avoid bending or damaging delicate edges. For smaller or intricate cutters, consider using a compartmentalized organizer so nothing gets lost or bent.
Extra tip: lightly oil metal cutters with a food-safe oil occasionally to prevent rust if you live in a humid climate. This keeps them sharp and ready for spooky season every year.
Remember, clean and dry cutters are safer and perform better — your future self will thank you when you’re ready to craft those haunting cookies again.
Frequently Asked Questions
What is the best type of dough for spooky cookie cutters?
The best dough is a firm, chilled sugar-cookie dough that holds its shape. Look for recipes with plenty of butter and a bit of flour to prevent spreading. Chilling the dough for at least 30 minutes helps maintain sharp, clean edges during cutting.
How do I prevent my cookies from spreading or losing detail?
Ensure your dough is cold and stiff before cutting. Re-chill the cutouts for 10-15 minutes before baking. Also, avoid overworking the dough and bake at a steady temperature, usually around 350°F, to keep shapes crisp and details sharp.
Can I use spooky cookie cutters for other foods?
Yes! Many cutters work well with fondant, marzipan, or even sandwiches if they’re made from pliable, food-safe materials. Just make sure the cutter is clean and suitable for the type of food you’re shaping.
Are plastic cookie cutters safe for children?
Plastic cutters with blunt edges are generally safe for kids, but adult supervision is recommended, especially with metal cutters that have sharp edges. Choose child-friendly designs and always handle cutters carefully.
How should I store my cookie cutters to keep them in shape?
Store them flat in a dedicated container or hang them in your baking area. Make sure they’re completely dry to prevent rust and warping. Keeping them separated prevents damage to delicate edges or embossed details.
Conclusion
Spooky Halloween cookie cutters turn your baking into a creative, fun, and spooky adventure. With the right shapes, materials, and techniques, you can craft treats that wow everyone—even if they’re just for a simple Halloween party.
So, grab your cutters, prepare your dough, and get ready to turn your kitchen into a haunted bakery. Your ghastly good cookies are just a cut away from being the highlight of the night.
NFL season / tailgating Picks
team gear
As an affiliate, we earn on qualifying purchases.