Curd cheese snack balls, or kurt, are a nutritious treat packed with protein and minerals, perfect for snacking. Traditionally made from drained fermented milk, they reflect a deep cultural heritage along the Silk Road. You can customize them with various seasonings and fresh herbs. Chilling the balls helps enhance their texture, while different coating options, like breadcrumbs, add crunch. Want to explore a simple recipe and cooking tips? There's plenty more to discover!
History

Curd cheese snack balls, or kurt, have a fascinating history that stretches back centuries along the Silk Road. These cheese balls were essential for nomadic peoples, providing a durable snack during long journeys.
Traditionally made from drained fermented milk, kurt boasts an impressive shelf life of 7-8 years, making it perfect for travelers and herders. The natural fermentation process often took place while on the move, thanks to the galloping animals, resulting in a calorie-dense treat.
Traditionally crafted from drained fermented milk, kurt offers travelers a long-lasting, calorie-dense snack with an impressive shelf life of 7-8 years.
In Kazakh heritage, these curd cheese balls symbolize resilience and a strong connection to ancestral traditions, especially during famine.
You'll find variations of kurt across Central Asia, each reflecting the diverse culinary practices and cultural significance of this remarkable snack.
Recipe

To achieve the best results, it's essential to allow the dough to rest in the fridge for about an hour. This resting period enhances the flavor and texture, making the balls light and airy when cooked.
Once you're ready to cook, you can either fry or bake them according to your preference. The final touch of rolling the fried balls in a cinnamon-sugar mixture adds a sweet finish that perfectly complements the savory cheese flavor.
Ingredients:
- 500g cottage cheese
- 2 eggs
- 1 teaspoon salt
- 2 tablespoons sugar
- 100g semolina
- 100g flour
- Oil for frying (or baking spray for baking)
- Cinnamon and sugar mixture for rolling
Cooking Instructions:
In a large mixing bowl, combine the cottage cheese, eggs, salt, sugar, semolina, and flour. Mix until you have a homogeneous dough.
Cover the bowl with plastic wrap and place it in the fridge for one hour to allow the flavors to meld and the texture to set.
After the resting period, remove the dough from the fridge and form it into balls weighing between 30g and 80g.
Heat oil in a deep pan to a temperature of around 150 degrees Celsius. Carefully fry the balls in batches, cooking smaller balls for about 5 minutes and larger ones for 8-10 minutes, until golden brown.
Once fried, roll the balls in a mixture of cinnamon and sugar before serving.
Extra Tips:
For a healthier alternative, consider baking the curd cheese balls instead of frying them.
Preheat your oven to 200°C and lightly spray a baking sheet with oil. Place the formed balls on the sheet and bake for 12-14 minutes or until golden brown, turning them halfway through for even cooking.
Additionally, experiment with different spices in the cinnamon-sugar mixture, such as nutmeg or cardamom, for a unique flavor twist.
Enjoy your delicious snack balls warm for the best experience!
Cooking Steps

To start making your Curd Cheese Snack Balls, gather all the ingredients you'll need.
Mix the cheese with your favorite herbs to enhance the flavor, then form the mixture into bite-sized balls.
Once shaped, chill them before frying or baking for the best texture.
Step 1. Gather All Ingredients Needed

Before diving into the delicious process of making Curd Cheese Snack Balls, you'll want to gather all the essential ingredients.
Start with 900 g (2 lb) of heavy cottage cheese or curds, 2 eggs, 1 tsp salt, and 130 g (4.5 oz) sugar. You'll also need 250 g (1/2 lb) of semolina and 250 g (1/2 lb) of wheat flour for the dough preparation.
To create a smooth texture, use a sieve to grind the cottage cheese before mixing it with the eggs in a deep bowl. Once you've blended in the salt, sugar, semolina, and flour, it's time to shape your mixture into one ball.
Additionally, prepare toasted breadcrumbs by heating 100–150 g (3.5–5 oz) in a dry frying pan.
Step 2. Mix Cheese and Herbs

Start by combining grated cheddar cheese, hung curd, and toasted breadcrumbs in a mixing bowl. This forms a cohesive base for your snack balls.
Next, it's time to mix cheese and herbs. Add fresh herbs like parsley or mixed Italian herbs to elevate the flavor profile.
Don't forget to incorporate spices such as salt and finely chopped green chilies to give your mixture a delightful kick. Ensure everything is well-blended, as this consistency will maintain a uniform taste in every bite.
Taste your mixture to adjust the seasoning if needed. Once you've got the perfect flavor, you'll be ready to shape the mixture into uniform balls, ensuring even cooking and optimal texture when frying or baking.
Step 3. Form Into Bite-Sized Balls

Creating bite-sized balls from your cheese mixture is a simple yet rewarding process. Start by weighing each portion between 30g to 80g for consistent sizes, ensuring even cooking.
To make ball formation easier, oil your hands to prevent sticking. Use a scoop or scale for uniformity; remember that smaller balls fry faster, while larger ones may need more time in the frying pan.
It's crucial to keep your dough chilled in the fridge for at least one hour before shaping, which helps with texture. Additionally, incorporating ingredients like chia seeds can enhance the nutritional profile, offering benefits such as high fiber content that promotes satiety.
Once you're ready, quickly roll the balls in your hands to create a smooth surface. This not only aids in even frying but also enhances the appearance of your delicious curd cheese snack balls.
Step 4. Chill Before Frying or Baking
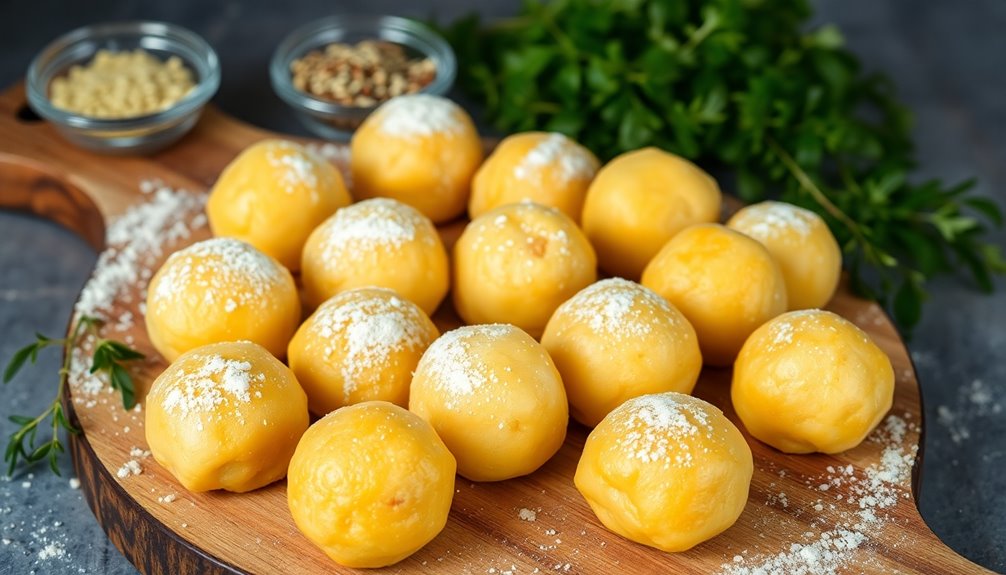
Chilling the dough for your curd cheese snack balls is essential to achieving the perfect texture and flavor. You should allow the dough to rest in the fridge for at least one hour. This step enhances the flavor and improves the texture, ensuring it firms up nicely.
A cooler dough temperature definitely makes it easier to shape into consistent balls and prevents them from falling apart during cooking. Once shaped, consider chilling the formed balls for an additional 15-30 minutes before frying or baking. This extra time solidifies them further, helping to maintain their shape when exposed to hot oil or oven heat.
Lastly, avoid overcrowding the fryer or baking tray to ensure even cooking for a crispy exterior and tender inside.
Step 5. Coat With Breadcrumbs or Flour

After you've chilled your curd cheese balls, it's time to give them a delicious coating.
Start by rolling each ball in breadcrumbs to create a crispy outer layer that enhances both texture and flavor. For an extra crunch, toast the breadcrumbs in a dry frying pan for 2-4 minutes before coating. This step adds a wonderful nutty flavor.
Make sure to coat the balls evenly to prevent sticking and ensure uniform cooking during frying. If you prefer a lighter option, dust them with flour instead, which helps achieve a beautiful golden color.
Alternatively, mix breadcrumbs with grated cheese for an extra cheesy flavor. Whichever option you choose, your snack balls will be irresistible!
Final Thoughts

While experimenting with curd cheese snack balls can be a fun culinary adventure, the end result is a delicious treat that impresses at any gathering.
When you combine cottage cheese, semolina, and flour, you create a crispy, cheesy texture that's hard to resist. Frying these balls at around 150 degrees Celsius ensures they turn a perfect golden brown without burning.
You'll find that smaller balls fry in just about 5 minutes, while larger ones take 8-10 minutes, giving you that ideal crunch. For an extra flavor boost, coat them in cinnamon sugar, especially the smaller versions.
By using high-quality curds and draining them properly, you'll achieve a dense, flavorful snack that delights everyone.
Enjoy your culinary success!
Frequently Asked Questions
Are Cheese Curds a Healthy Snack?
Are cheese curds a healthy snack? You bet! Packed with protein and calcium, they support muscle repair and bone health.
Their low carb content makes them perfect for your low-carb diet. Just remember, while they're rich in healthy fats and satisfy your cravings, moderation is key.
Keep an eye on sodium levels, too. Balancing cheese curds with fresh veggies or fruits can help you maintain a wholesome diet.
Enjoy your snacking!
Were Cheese Balls Discontinued?
Yes, cheese balls were discontinued by several brands due to declining sales and a shift towards healthier snack options.
Notably, Kraft Foods stopped producing their cheese balls in 2009, focusing on more health-oriented products.
However, smaller companies still make them, keeping the nostalgic appeal alive.
If you're a fan, you might find limited editions or special flavors reappearing thanks to the buzz on social media, reigniting interest among fellow enthusiasts.
What Is the Difference Between a Cheese Curd and a Cheese Ball?
Cheese curds and cheese balls differ in texture and preparation.
When you bite into cheese curds, you'll notice their rubbery texture and mild, slightly tangy flavor. They're fresh and unaged.
On the other hand, cheese balls are typically made from various cheeses mixed with breadcrumbs and spices, then shaped into round forms.
You'll find them crispy and savory, often served as appetizers.
What's the Difference Between Cheese Curds and Curd Cheese?
Imagine you're at a local fair, savoring squeaky cheese curds. These fresh, unaged bites are made from whole milk and have a higher moisture content, giving them that unique texture.
In contrast, curd cheese, often creamy and spreadable, is made from skimmed milk. It's versatile, perfect for desserts or spreads, and has a longer shelf life.

