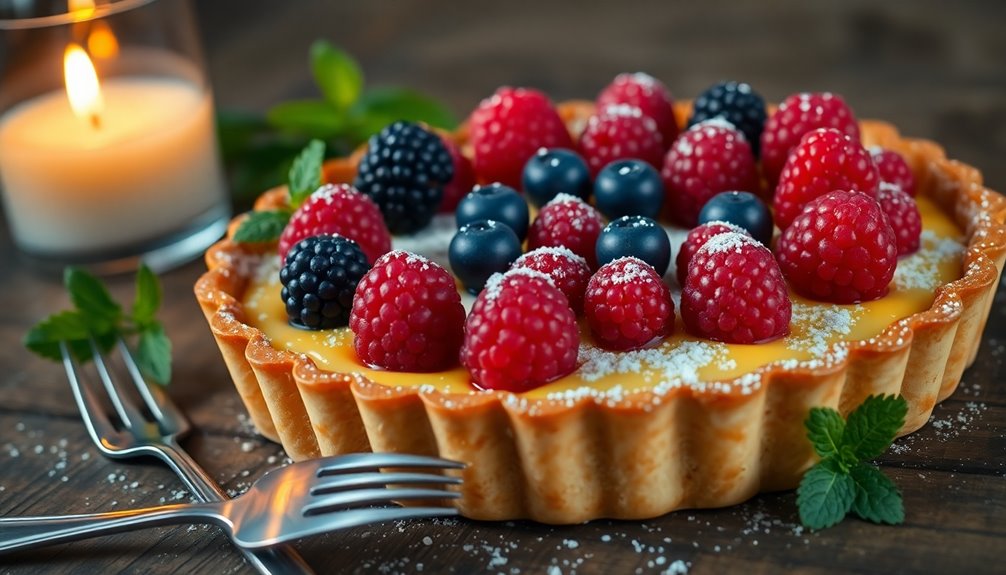

Creating tart candles blends the art of candle making with delicious food-inspired designs. You'll need candle wax, dyes, and fragrance oils to make these charming tarts. Melt the wax, add your favorite scents, and pour it into silicone molds. After cooling, you can enjoy a beautiful, aromatic addition to your space. Plus, you'll find that using tarts in wax warmers offers a flameless, safe option for enjoying delightful scents. Discover how to elevate your crafting experience even further.
History

The history of tart candles is fascinating, tracing back to ancient civilizations that crafted primitive candles from beeswax. These early creations often took the shape of food items, including tarts, highlighting the connection between culinary art and candle making. The use of color accuracy in modern candle designs can enhance the visual appeal, much like how it impacts overall image quality in home cinema projectors. Additionally, the raw food diet emphasizes the artistic representation of food, which parallels the aesthetic appeal of tart candles.
By the 18th century, the introduction of stearin and paraffin wax allowed artisans to produce more elaborate designs, paving the way for the tart-shaped candles we know today. The 1980s saw a surge in popularity for scented candles, with candle fragrance experimentation leading to the delightful emergence of tart candles that evoke a sense of baked goods.
Modern innovations, like silicone molds, enable intricate tart wax designs, enhancing creativity and variety in these charming, aromatic products. Additionally, the historical context of butter making demonstrates how food has influenced various cultural crafts, including candle making.

Direct Candle Supply 5lb Soy Wax Melt Slab for Wax Melts
- Versatile Wax for Crafts: Ideal for wax melts and molds
- Customizable Fragrance: Add your favorite scent oils
- Premium Quality Ingredients: Blended paraffin and soy for clean burn
As an affiliate, we earn on qualifying purchases.
As an affiliate, we earn on qualifying purchases.
Recipe

Creating your own candle tarts is a fun and creative way to infuse your space with delightful fragrances and colors. The process begins by gathering the appropriate materials, including candle wax specifically made for tarts. This wax is designed to melt easily and hold fragrance well, ensuring a lovely scent throw as it warms. You'll also need candle dyes to achieve the perfect hues and fragrance oils to personalize your tarts to your liking. Using high-quality wax will enhance the overall performance of your tarts, especially when combined with HEPA filters for improved air quality during the melting process.
Crafting your own candle tarts is a delightful way to fill your home with beautiful fragrances and colors.
Before starting, it's essential to prepare your workspace and gather all the necessary tools. Ensure you have silicone molds ready, as they'll help shape your candle tarts beautifully. The melting process is crucial, so using a thermometer to monitor the temperature will help you achieve optimal results. Once everything is in place, you'll be ready to create stunning and aromatic candle tarts that will enhance any room. Additionally, consider using essential oils known for their calming properties to create a soothing atmosphere while you craft your tarts.
Ingredients:
- Candle wax for tarts
- Candle dye (blocks of yellow and red)
- Fragrance oil (e.g., autumn spice blend)
- Silicone molds
Instructions:
Begin by cutting the candle wax into small pieces to facilitate melting, and heat it until it reaches around 170 degrees Fahrenheit.
While the wax is melting, shave off small pieces of candle dye and mix them to create your desired color, testing the shade on white paper.
Once the wax is melted and clear, add about one teaspoon of your chosen fragrance oil, stirring thoroughly to combine.
Carefully pour the melted wax into the silicone molds, ensuring not to overfill. Allow the tarts to cool completely at room temperature, or speed up the process by placing them in the fridge.
Once cooled, gently bend the silicone molds to unmold the tarts.
Extra Tips:
When making candle tarts, consider experimenting with different fragrance combinations and colors for unique creations.
Always test the fragrance strength in a small batch before committing to a larger quantity, as some scents can be quite potent.
Additionally, keep safety in mind by using heat-resistant gloves and working in a well-ventilated area to avoid fumes during the melting process.
Lastly, have fun with the shapes and textures by using various silicone molds to create visually appealing designs!
Cooking Steps

To get started, gather all your ingredients and tools for making your candle tarts. Adding essential oils, particularly aromatic benefits, can enhance the overall ambiance of your tarts. Essential oils can also improve scalp health, providing additional benefits beyond their fragrance.
Next, you'll melt the wax in a double boiler, keeping an eye on the temperature for safety.
Once it's ready, you can add your fragrance oil and pour the mixture into molds, setting the stage for your beautiful tarts. Remember to ensure all connections are secure and free from damage, just as you would with the ignitor on a wood pellet stove.
Step 1. Gather Your Ingredients First

Before diving into the fun of making candle tarts, gather all your ingredients to ensure a smooth process. Start with candle wax specifically labeled for tarts, as it guarantees the right melting properties and fragrance retention.
Next, select a suitable silicone mold that shapes your tarts effectively and allows for easy removal. You'll also want to acquire two colors of candle dye—like yellow and red—to create visually appealing and vibrant tarts.
Don't forget to choose a fragrance blend, such as autumn spice, to infuse a delightful scent. Lastly, ensure you have a candle thermometer on hand to monitor the wax temperature accurately, aiming for around 170 degrees for optimal melting.
Additionally, be mindful that proper storage of your tarts in a cool, dark place is essential to prolong their lifespan and maintain their integrity.
These three different elements will set you up for success!
Step 2. Melt Wax in Double Boiler

Melting wax in a double boiler is a straightforward process that ensures even heating and prevents overheating.
Start by chopping the wax into small pieces, which helps it melt faster and more uniformly.
Place a heat-resistant container filled with the wax into a pot of simmering water.
As the wax melts, monitor its temperature with a candle thermometer, aiming for around 170 degrees Fahrenheit.
Stir the wax gently to promote consistency and avoid air bubbles, which can mar the final product's appearance.
Once the wax is fully melted and clear, carefully pour it into your molds or containers.
Allow it to cool completely before unmolding or using, ensuring a perfect tart with a smooth finish.
Step 3. Add Fragrance Oil Now

At this stage, adding fragrance oil is crucial for creating delightful candle tarts. Wait until the melted wax reaches around 170 degrees Fahrenheit, as this temperature ensures optimal scent release.
You'll want to use approximately one teaspoon of fragrance oil per batch of melted wax to achieve that balanced, inviting aroma. Before adding the fragrance, check that the wax is clear and fully liquid, which usually happens when it melts around 135 degrees.
Once you're ready, stir the fragrance oil into the melted wax thoroughly to guarantee even distribution. It's important to allow the mixture to cool slightly before moving on to the next step, ensuring the fragrance and color maintain their integrity.
Enjoy the process!
Step 4. Pour Mixture Into Molds

Carefully pour the fragrant wax mixture into your molds once it reaches a clear, liquid state at around 170 degrees Fahrenheit.
If you want to add color, mix red and yellow wax to achieve your desired orange hue before pouring.
As you fill the molds, be mindful not to overfill them to prevent spills and ensure a neat finish.
Once you've poured the wax, you can let it cool at room temperature, or speed things up by placing the molds in the refrigerator.
Keep an eye on the tarts as they cool, and once they're completely set, gently bend the silicone molds to pop out the tarts for easy removal and storage.
Enjoy your beautifully crafted wax tarts!
Step 5. Cool and Set Tart

After you've filled your molds with the fragrant wax mixture, it's important to let the tarts cool and set properly.
Allow the melted wax to cool completely at room temperature to ensure solidification without distortion. If you're in a hurry, you can place the silicone molds in the refrigerator for a short period, but don't leave them too long to avoid condensation.
Once cooled, gently bend the silicone mold to pop out the tarts, making sure they keep their shape and texture.
After unmolding, clean the silicone mold with a suitable cleaner to maintain its quality for future use.
Your finished tarts should display vibrant colors and textures, ready to use in wax warmers for delightful scent release.
Final Thoughts

While creating your own candle tarts can be a fun and rewarding process, it's essential to remember the importance of safety and quality in your crafting.
Make sure to use candle wax specifically labeled for tarts, as this ensures proper melting and scent distribution. Control your melting temperature around 170 degrees Fahrenheit to prevent flammability, and don't forget to add fragrance oils and dye for a personalized touch.
When your tarts are ready, unmold them from silicone molds for a beautiful display of colors and textures. Enjoy the flameless option of scented tarts in your wax warmer, and let your creativity shine.
With these tips in mind, you're set to make wonderful, aromatic additions to your home.
Frequently Asked Questions
What Is a Tart in Candle Making?
A tart in candle making is like the superhero of home fragrance! It's a wax melt, usually wickless, designed to unleash delightful scents when heated in a warmer.
You can find tarts shaped in fun segments, making them visually appealing. They can last for hours—some up to 50!
Plus, you can easily craft your own at home using silicone molds, allowing you to mix and match colors and fragrances for a truly personalized experience.
What Is the 84 Rule for Candles?
The 84 rule for candles suggests you burn your candle for one hour for each inch of its diameter.
So, if you've got a 3-inch diameter candle, it should burn for 3 hours. This helps create an even melt pool, maximizes fragrance release, and prevents tunneling.
What Candle Scent Is Most Popular?
Imagine walking into a cozy cabin, where the air is filled with the sweet, inviting aroma of Hot Maple Toddy®.
It's no surprise that this scent's captured hearts and garnered 97 glowing reviews, making it the most popular candle fragrance.
If you're looking for something to warm your space, this scent's your best bet.
With its rich, comforting notes, it's sure to create a welcoming atmosphere you won't forget.
What Is the Difference Between a Wax Tart and a Wax Melt?
The difference between a wax tart and a wax melt lies mainly in their size and usage.
Wax tarts are larger, often requiring you to cut them into smaller pieces before use, while wax melts are designed for single-use.
Both release fragrance when warmed, but tarts generally have longer burn times due to their size.
You'll want to consider how much scent you prefer, as this can influence your choice between the two.