
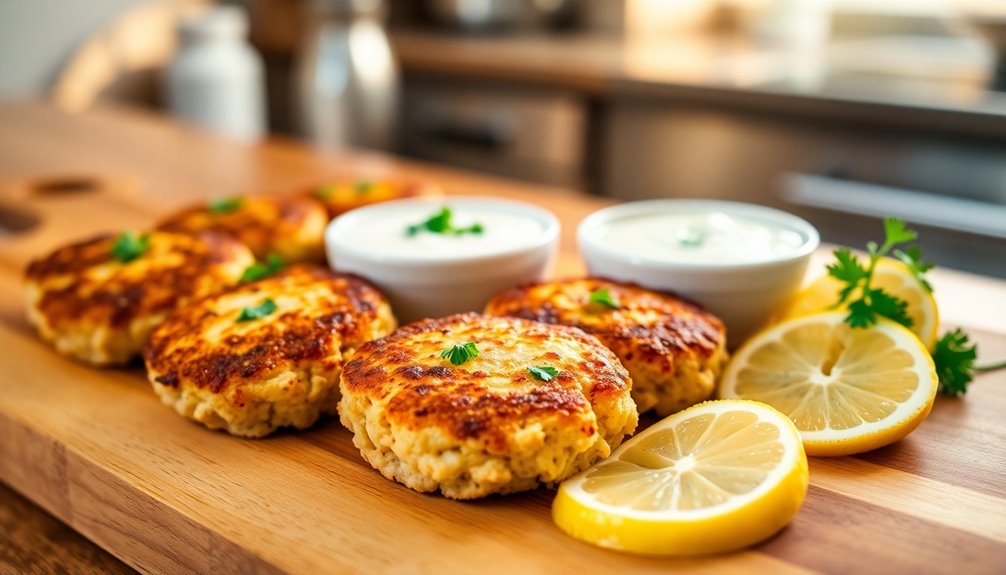
Classic crab cakes offer a delicious seafood experience, highlighting fresh, lump crab meat that shines through as a key ingredient. Combining this tender meat with breadcrumbs, mayonnaise, and seasonings creates a flavorful dish perfect for appetizers or main courses. Cooking these cakes is straightforward, ensuring a golden crust while retaining their tender texture. The right sauces and seasonings can elevate your dish further. Stick around to discover cooking techniques and tips to make the best crab cakes!
History

While you might think of the classic dad cap as just another fashion accessory, its roots run deep in American culture. Gaining popularity in the 1970s and 1980s, this cap emerged as a casual item and a practical choice for outdoor activities.
Originally designed for sports teams, it quickly became a staple for dads and their kids, earning the affectionate name "dad cap." Unlike traditional fitted caps, the dad cap features an unstructured, low-profile design that offers a relaxed, comfortable fit.
With materials like cotton and polyester blends, these caps ensure breathability for all-day wear. The antique brass buckle closure and embroidered designs add a vintage touch, making them appealing to diverse fashion tastes.

PONTCHARTRAIN BLUE CRAB Lump Crab Meat, 8 OZ
As an affiliate, we earn on qualifying purchases.
As an affiliate, we earn on qualifying purchases.
Recipe
Crab cakes are a timeless seafood dish that showcases the sweet, delicate flavor of fresh crab meat. These delectable treats are perfect as an appetizer or main course and can be enjoyed on their own or served with a tangy sauce. The key to a successful crab cake lies in balancing the crab with just the right amount of binding agents and seasonings, allowing the crab to shine as the star ingredient.
To create the perfect crab cakes, start with high-quality, lump crab meat. Combine it with fresh herbs, spices, and a few simple ingredients to create a mixture that holds together without overpowering the natural sweetness of the crab. Whether you choose to pan-fry or bake them, these crab cakes are sure to be a hit at any gathering or family dinner.
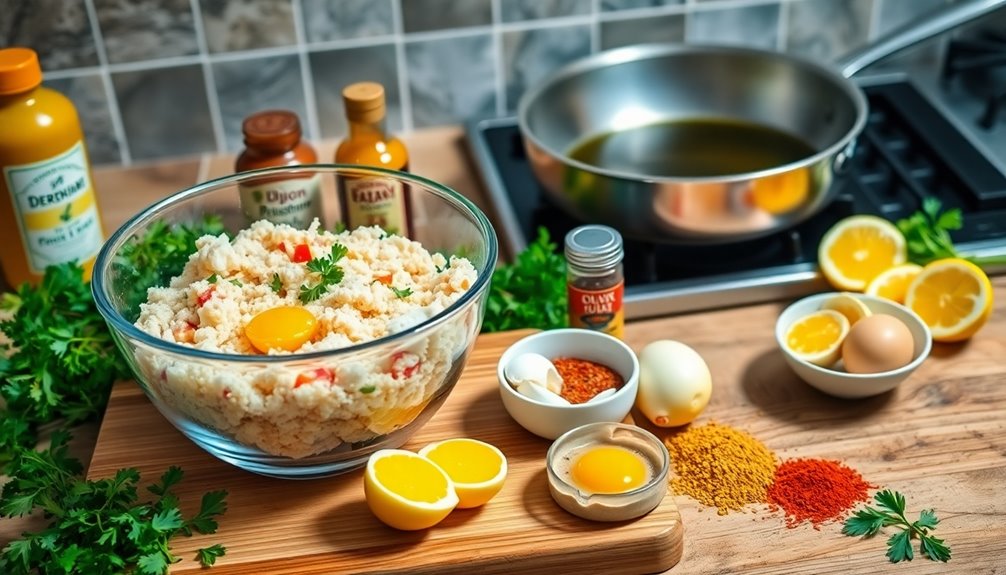
Ingredients:
- 1 pound lump crab meat
- 1 cup breadcrumbs
- 1/2 cup mayonnaise
- 1 egg
- 1 tablespoon Dijon mustard
- 1 tablespoon Worcestershire sauce
- 2 tablespoons fresh parsley, chopped
- 1 teaspoon Old Bay seasoning
- Salt and pepper to taste
- Olive oil (for frying)
Instructions:
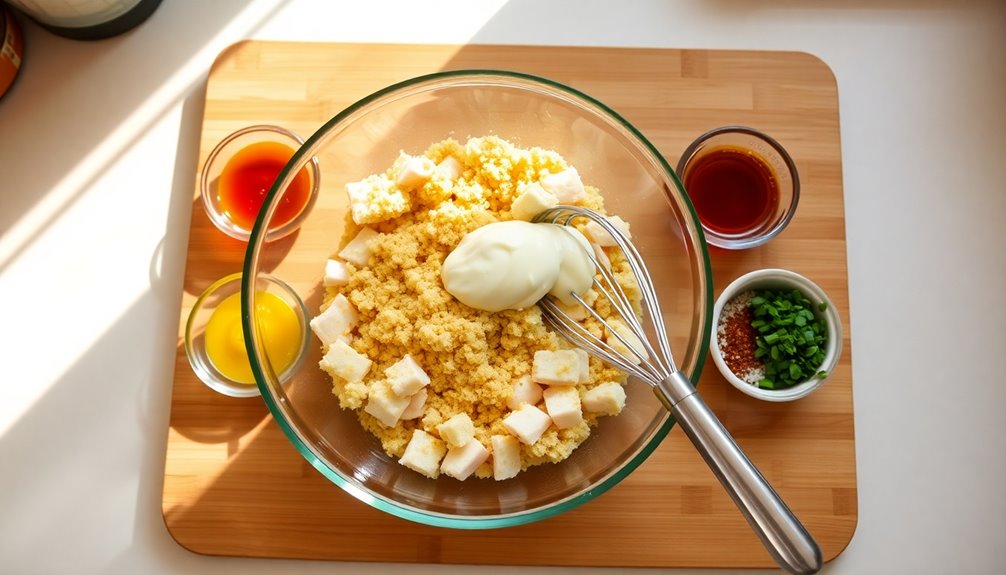
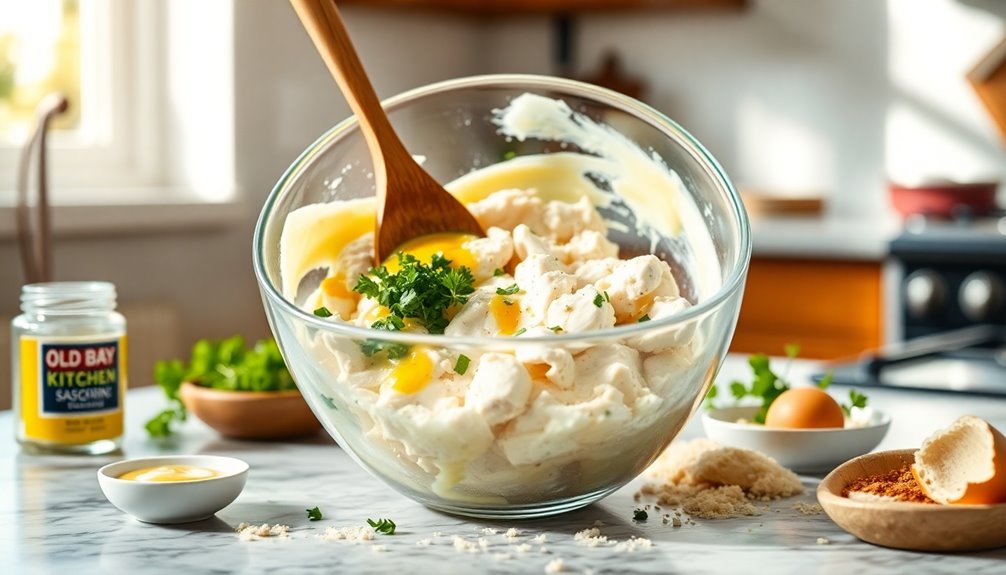
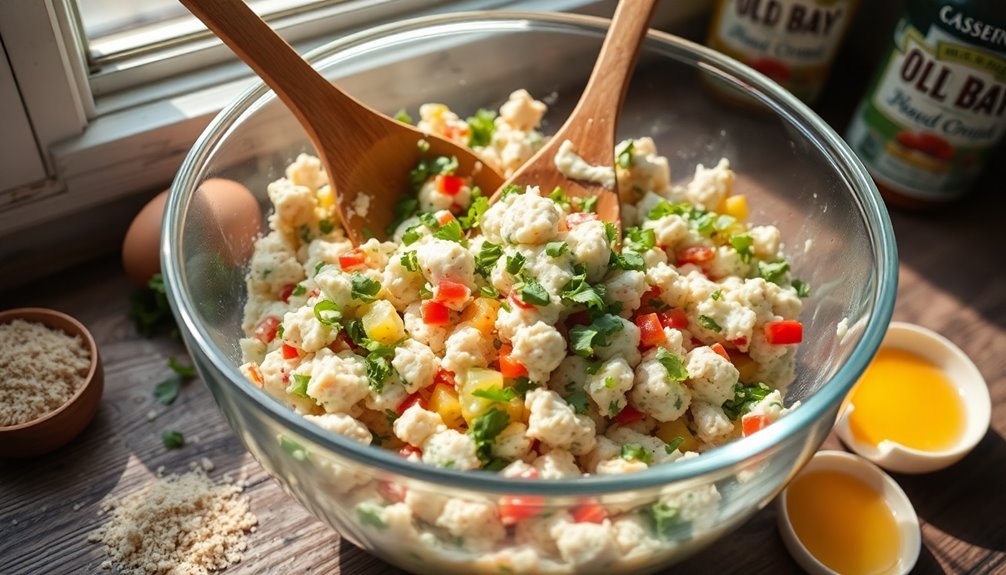
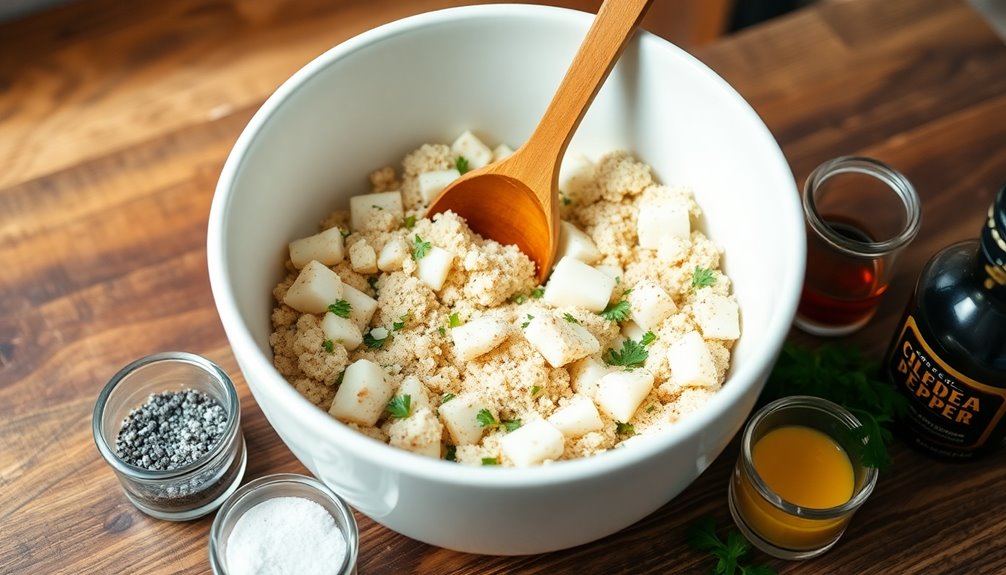
In a large mixing bowl, gently combine the lump crab meat, breadcrumbs, mayonnaise, egg, Dijon mustard, Worcestershire sauce, parsley, Old Bay seasoning, salt, and pepper. Be careful not to break up the crab meat too much; you want to maintain the lumps for a great texture.
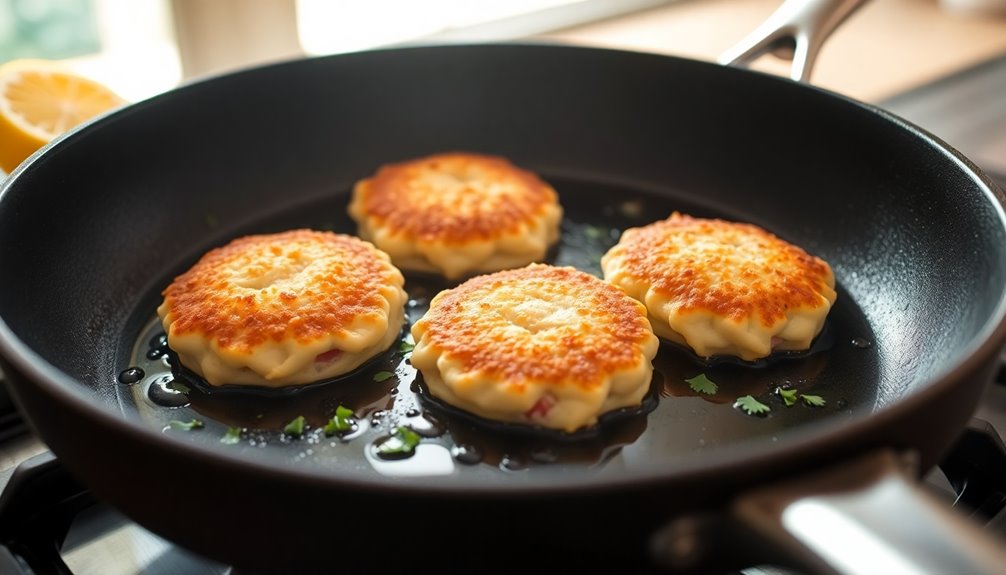
Once the mixture is well blended, cover and refrigerate for about 30 minutes to help it firm up. After chilling, form the mixture into patties, about 3 inches in diameter. Heat olive oil in a skillet over medium heat and cook the crab cakes for 4-5 minutes on each side until golden brown and heated through.
Extra Tips:
For the best results, make sure to use fresh, high-quality crab meat to enhance the flavor of your crab cakes. If you prefer a baked version, preheat your oven to 375°F (190°C) and place the formed crab cakes on a baking sheet lined with parchment paper. Bake for about 15-20 minutes or until they're crispy and golden.
Additionally, feel free to customize your crab cakes by adding other ingredients such as diced bell peppers or green onions for extra flavor. Serve with a side of tartar sauce or a squeeze of lemon for an added zing!

Bread Crab Fondant Molds, Sea Themed Crabs Silicone Molds, Crab Pliers Claws Shell Chocolate Molds for Baking Cake Decoration Cupcake Topper Candy Biscuit Jelly Ice Clay Resin DIY Crafts
Versatile Molds: This set includes bread crab fondant molds in the shape of crabs pliers, claws, and crabs…
As an affiliate, we earn on qualifying purchases.
As an affiliate, we earn on qualifying purchases.
Cooking Steps
Before you start cooking, gather all your ingredients and tools to keep things organized.
Mix the dry ingredients thoroughly to ensure even flavor, then gently combine the wet ingredients.
Finally, fold in chopped vegetables and add seasoning to taste for a delicious finish.
Step 1. Gather Ingredients and Tools
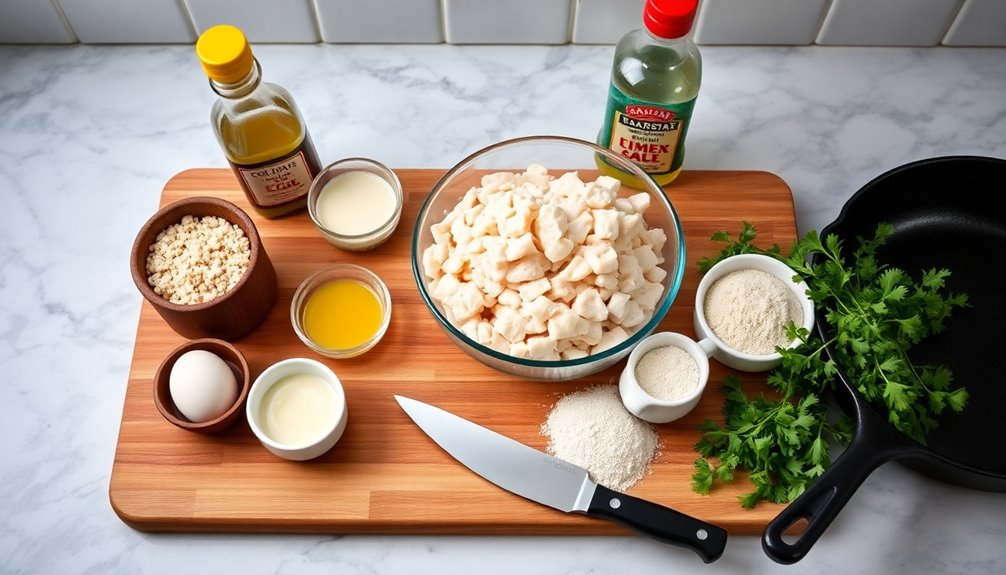
To kick off your classic cap creation, you'll want to gather all the essential ingredients and tools. Make sure you have fresh flour, sugar, and eggs on hand, as they're crucial for achieving the right texture.
Next, prepare your tools; grab mixing bowls, measuring cups, and a whisk for efficient mixing. Don't forget to preheat your oven to around 350°F for even baking.
A sifter is also handy to aerate your dry ingredients, ensuring a lighter, fluffier cap. Lastly, keep a cooling rack nearby after baking. It'll help your cap maintain its shape and prevent sogginess.
With everything ready, you're set to make a classic cap that's sure to impress!
Step 2. Mix Dry Ingredients Thoroughly
With your ingredients and tools ready, it's time to mix the dry ingredients thoroughly. Start by measuring each dry component accurately; precise amounts are crucial for your recipe's success.
In a large bowl, use a whisk or sifter to combine flour, sugar, baking powder, and any other dry ingredients. This ensures even distribution of leavening agents and contributes to a light and airy texture that is essential for baked goods.
For best results, incorporate the dry ingredients in small batches, folding them together gently to prevent clumping. After mixing, always check for lumps—if you find any, re-sift the mixture.
This step is essential for achieving that light and airy texture that makes baked goods irresistible. Take your time here; it'll pay off in the final product! Additionally, a well-mixed dry ingredient blend can enhance the flavor profile, similar to how savory ingredients are used in dishes like flautas.
Step 3. Combine Wet Ingredients Gently
Gently combine your wet ingredients, like eggs, milk, or oil, to create a smooth mixture. Use a rubber spatula or whisk, employing a soft folding motion that avoids overmixing.
Gradually incorporate the wet mixture into your dry ingredients to ensure an even consistency and prevent clumping. If you've melted butter or chocolate, let it cool slightly before mixing to avoid cooking the other ingredients.
Remember, you want to mix just until combined; a few lumps are perfectly fine. Overmixing can lead to dense or tough baked goods, which you definitely want to avoid.
Step 4. Fold in Chopped Vegetables
Incorporating chopped vegetables into your batter is a crucial step that adds flavor and texture to your dish. Start by preparing your chopped vegetables into uniform sizes, ensuring they cook evenly. Baked kale, for instance, can be a nutritious addition, providing essential nutrients like vitamins A, C, and K. Chia seeds can also enhance the nutritional profile, as they are a rich source of dietary fiber.
Use a large mixing bowl to gently fold in the vegetables, allowing them to blend without bruising or breaking apart. A spatula or wooden spoon works best for this process, as they won't damage your veggies. If you're using any dressings or additional flavorings, fold them in with the vegetables to ensure every piece is well-coated. Timing is essential—add the vegetables just before cooking to avoid overcooking, which can strip away their color and crispness. Additionally, consider adding chia seeds to your batter for an extra boost of nutrition and texture.
Enjoy the fresh taste they bring to your dish!
Step 5. Add Seasoning to Taste
As you cook, tasting your dish regularly helps you pinpoint any flavors that might need enhancement. Start by adding salt gradually to amplify the natural flavors of your ingredients; it draws out moisture and develops a richer taste. Incorporating shrimp and potato can also add a savory depth to your meal. For example, consider the addition of Dirt Cups as a playful dessert to complement your savory dish.
Don't forget to include herbs and spices based on your recipe or personal preference. Fresh herbs brighten up the dish, while dried ones pack a more concentrated punch.
Pay attention to the dish's acidity and balance it with lemon juice or vinegar to elevate the overall flavor.
Finally, adjust the seasoning at the end of cooking since flavors can intensify during the process. Make those last tweaks to achieve that perfect flavor balance that'll impress everyone! Additionally, consider incorporating natural sweeteners to enhance the taste of your dishes without added sugar.

OLD BAY Crab Cake Classic Mix, 1.24 oz
Member of the world-famous OLD BAY Seasoning flavor family
As an affiliate, we earn on qualifying purchases.
As an affiliate, we earn on qualifying purchases.
Final Thoughts
Whether you're heading out for a casual day or just want to top off your outfit, the classic dad cap is a versatile accessory that shouldn't be overlooked.
With its soft, breathable 100% cotton construction, you'll enjoy comfort all day long. The unstructured, low-profile design gives you that relaxed vibe, fitting seamlessly into various casual outfits.
Plus, the adjustable strap with an antique brass buckle ensures a perfect fit for most head sizes. Available in colors like White, Navy, and Pink, you can easily express your personal style.
Durable features, like the four-row stitching on the visor and the Permacurv® visor, add longevity and aesthetic appeal.
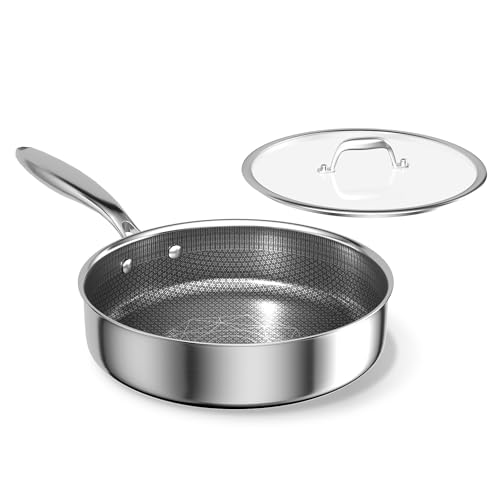
COOKER KING 3.6-Quart Hybrid Stainless Steel Sauté Pan with Lid, 10" Tri-Ply Clad Deep Frying Pan, Non-Stick & Non-Toxic Skillet for Egg, Cake, Seafood, Induction Compatible, Oven & Dishwasher Safe
【HYBRID TECHNOLOGY & TOXIN-FREE】: Combines a laser-etched stainless steel surface with a PFOA-free coating for professional searing and…
As an affiliate, we earn on qualifying purchases.
As an affiliate, we earn on qualifying purchases.
Frequently Asked Questions
What Are the Best Side Dishes to Serve With Classic Crap?
Did you know that over 60% of people prefer savory side dishes?
When it comes to complementing your main dish, you can't go wrong with buttery garlic mashed potatoes or roasted vegetables. A fresh salad with a tangy vinaigrette adds a nice crunch, while creamy coleslaw brings a delightful contrast.
You might also consider serving warm bread rolls for that perfect touch. These sides will elevate your meal and satisfy everyone at the table!
Can Classic Crap Be Made Vegetarian or Vegan?
Yes, you can definitely make it vegetarian or vegan!
Simply swap out the meat or seafood for your favorite plant-based proteins, like tofu or tempeh. Use vegetable broth instead of chicken or seafood broth for added flavor.
Incorporate plenty of veggies, legumes, or grains to enhance the dish. Don't forget to season well with herbs and spices to maintain that rich taste you love.
Enjoy experimenting with your plant-based version!
Where Can I Find Rare Ingredients for Classic Crap?
Imagine wandering through a vibrant market, where rare ingredients dance like jewels under the sun.
To find those elusive items, check local specialty stores, farmers' markets, or ethnic grocery shops. You might also explore online platforms dedicated to unique culinary finds.
Don't forget to connect with local foragers or join online communities; they often share tips on where to discover these hidden treasures.
Your culinary adventure awaits, and the flavors you'll uncover will inspire you!
How Do I Store Leftovers of Classic Crap?
To store your leftovers, first let them cool down to room temperature.
Then, divide them into smaller portions to make reheating easier.
Use airtight containers to keep them fresh, and label each container with the date.
You can refrigerate them for up to three days or freeze for longer storage, ideally up to three months.
When you're ready to eat, just reheat them thoroughly before enjoying your meal again!
What Are Common Mistakes to Avoid When Making Classic Crap?
When making any dish, it's easy to overlook a few common mistakes.
First, you might skip measuring ingredients, leading to imbalances in flavor.
Don't rush the cooking process; undercooking can ruin the dish.
Also, avoid overcrowding the pan, which can prevent proper browning.
Lastly, remember to taste as you go; it's crucial for achieving the right seasoning.