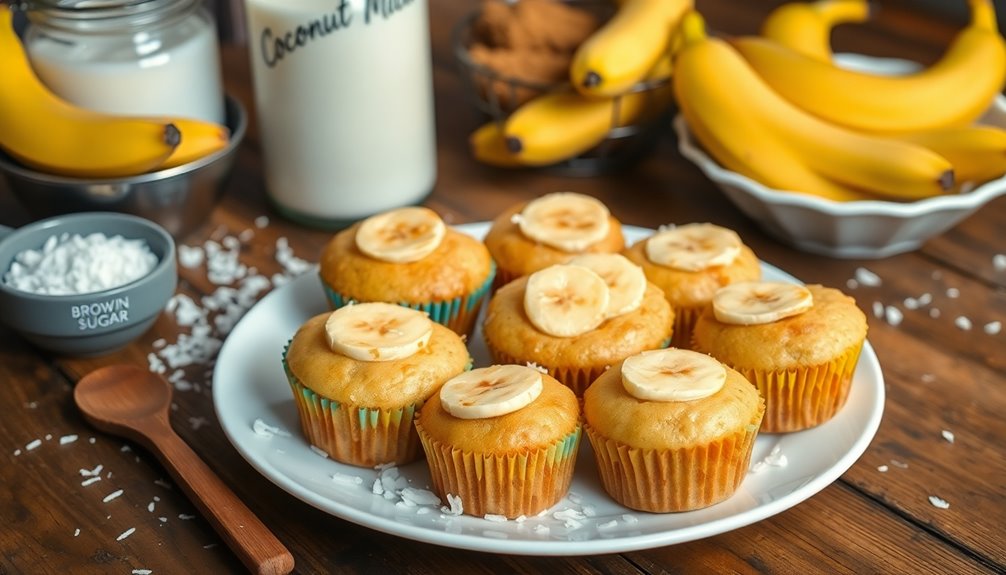

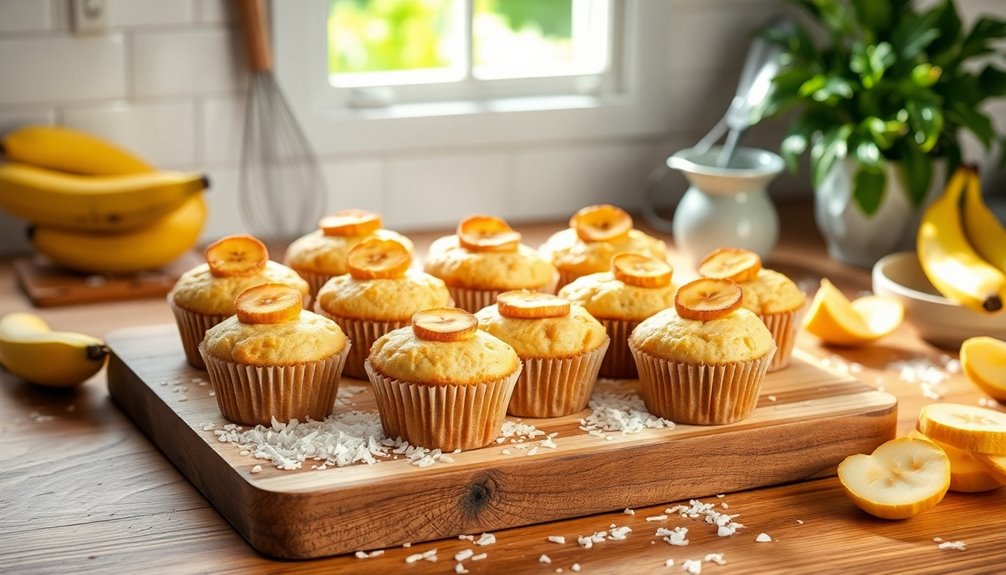
Coconut muffins with caramelized bananas are a delightful treat that combines tropical flavors and sweetness. You'll enjoy the moist texture from ripe bananas and the chewy bite of shredded coconut. Start by caramelizing banana slices in butter and brown sugar, then mix the wet and dry ingredients to create a smooth batter. Once baked, these muffins are perfect for breakfast or dessert. Stick around to discover tips for making them even more scrumptious!
History

The history of coconut muffins with caramelized bananas is rich and diverse, stemming from tropical regions where both ingredients thrive. In these areas, bananas and coconut are staples that locals often incorporate into their baking.
Caramelized bananas, a technique that dates back to the 19th century, amplify the fruit's natural sweetness, creating a deliciously rich flavor. Muffins themselves emerged in America during the 18th century, evolving from English versions to the denser, sweeter treats we enjoy today.
The 20th century saw a surge in coconut's popularity in baking, particularly in the United States and the Caribbean. Today, coconut banana muffins with caramelized bananas blend these historical influences, satisfying modern cravings for indulgence while keeping health-conscious choices in mind.
Recipe

Making these muffins is a straightforward process that anyone can master, even if you're a beginner in the kitchen. Start by preparing your ingredients and gathering your baking tools, and you'll be on your way to enjoying a batch of these delicious muffins in no time. The combination of textures and flavors will surely impress your family and friends!
Ingredients:
- 2 ripe bananas (mashed)
- 2 ripe bananas (sliced for caramelizing)
- 1 cup coconut milk
- 1/3 cup melted coconut oil
- 1 ½ cups all-purpose flour
- 1 teaspoon baking powder
- ½ cup brown sugar (for caramelizing)
- 2 tablespoons butter (for caramelizing)
- ½ cup shredded coconut
- 1 teaspoon vanilla extract
- Pinch of salt
Cooking Instructions:
Preheat your oven to 350°F and line a muffin tray with cupcake liners.
In a pan, melt butter over medium heat and add brown sugar to create a caramel for the sliced bananas. Sauté until golden and soft, then set aside.
In a large bowl, mix together the mashed bananas, coconut milk, melted coconut oil, and vanilla extract.
In another bowl, combine the flour, baking powder, shredded coconut, and salt. Gradually add the dry ingredients to the wet mixture, stirring until just combined.
Fill each muffin liner with the batter, then top with the caramelized banana slices. Bake for 20-25 minutes, or until a toothpick comes out clean.
Extra Tips:
For an added layer of flavor, consider adding a sprinkle of cinnamon or nutmeg to the batter.
Make sure your bananas are ripe, as this enhances the natural sweetness of the muffins.
Allowing the muffins to cool slightly before removing them from the pan helps maintain their texture and prevents sticking.
If you want to make these muffins ahead of time, they freeze well; just be sure to store them in an airtight container.
Enjoy your baking!
Cooking Steps

To kick off your coconut muffin adventure, you'll want to preheat your oven to 350°F.
Next, mash those ripe bananas well and mix them with your wet ingredients, ensuring everything blends smoothly.
Finally, don't forget to fold in the coconut flakes for that extra tropical touch!
Step 1. Preheat Oven to 350°F
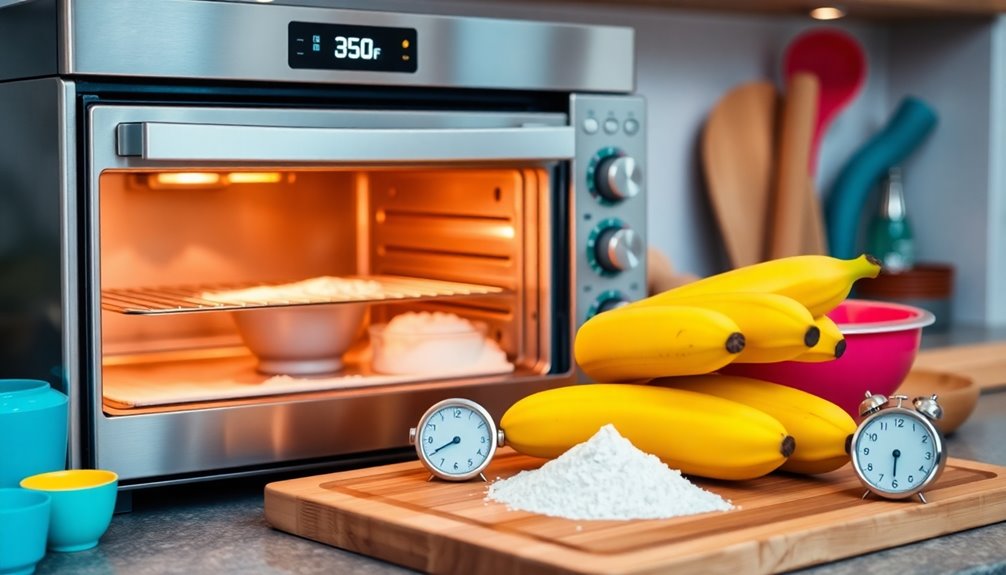
Preheating your oven to 350°F (175°C) is crucial for achieving perfectly baked coconut muffins. This temperature ensures even baking and proper rising, so don't skip this step.
Allow your oven to preheat for at least 10-15 minutes before you place the muffins inside. Consider using an oven thermometer to verify the temperature, as some ovens may not be accurately calibrated.
Position the oven rack in the center to promote even heat distribution during baking. Once you put the muffins in, avoid opening the oven door for the first 10 minutes. This keeps the temperature consistent and prevents the muffins from sinking.
Follow these steps, and you'll be on your way to delightful, fluffy coconut muffins!
Step 2. Mix Dry Ingredients Thoroughly
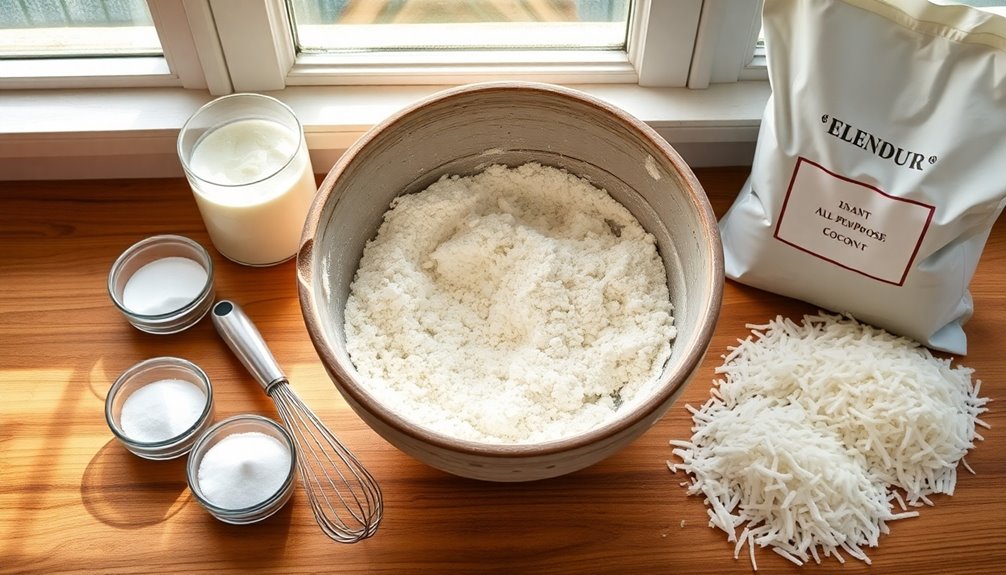
Mixing your dry ingredients thoroughly is essential for achieving the best texture in your coconut muffins. Start by sifting together flour, baking powder, baking soda, and salt. This aerates the mixture and ensures even distribution.
Next, combine sugar with the dry ingredients to prevent clumping, allowing for uniform sweetness in your recipe. Don't forget to add toasted coconut to the mix; it enhances the flavor and texture of your banana muffins. Additionally, incorporating chia seeds can provide added nutritional benefits, such as promoting digestive health. Chia seeds are also known for their high omega-3 content, which can further boost the health benefits of your muffins.
Use a whisk or fork to mix together everything, making sure no dry pockets remain. For accuracy, consider measuring your dry ingredients by weight, especially if you're using coconut flour, which can vary in density. Additionally, color accuracy is important in other recipes as it can enhance the visual appeal of your baked goods.
Your effort here sets the foundation for delicious muffins!
Step 3. Mash Ripe Bananas Well
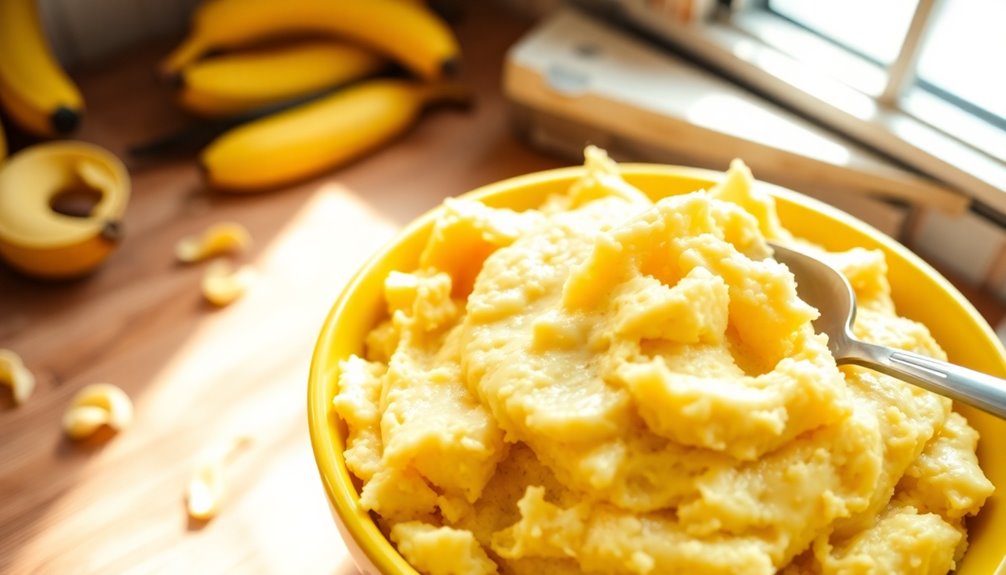
Peel the ripe bananas and place them in a large mixing bowl, as this will make mashing them much easier. Aim for about 2 medium ripe bananas, which should yield roughly 1 cup of mashed bananas.
Using a fork or potato masher, mash the bananas thoroughly until they reach a smooth consistency, with minimal lumps remaining. This step is crucial for creating a uniform texture in your muffins with almond, banana, and coconut.
The mashed bananas not only enhance the flavor but also add moisture, giving your muffins a tender, moist texture. Once you've achieved the right consistency, you're ready to incorporate them into your batter for a delicious treat!
Step 4. Add Wet Ingredients Gradually

As you prepare to add the wet ingredients to your dry mixture, make sure to do so gradually for the best results.
Start by pouring a small amount of the wet mixture into the dry ingredients, which include flour, sugar, baking powder, and mashed bananas. Gently mix together using a rubber spatula or wooden spoon. This gradual approach prevents lumps and ensures a smooth batter.
Continue adding the wet ingredients in increments, mixing until just combined to avoid overmixing, which can lead to dense muffins. Be mindful to incorporate all the wet ingredients evenly; this helps distribute the flavors of the caramelized bananas throughout.
This technique allows for better moisture absorption, resulting in light, fluffy, and flavorful muffins.
Step 5. Fold in Coconut Flakes
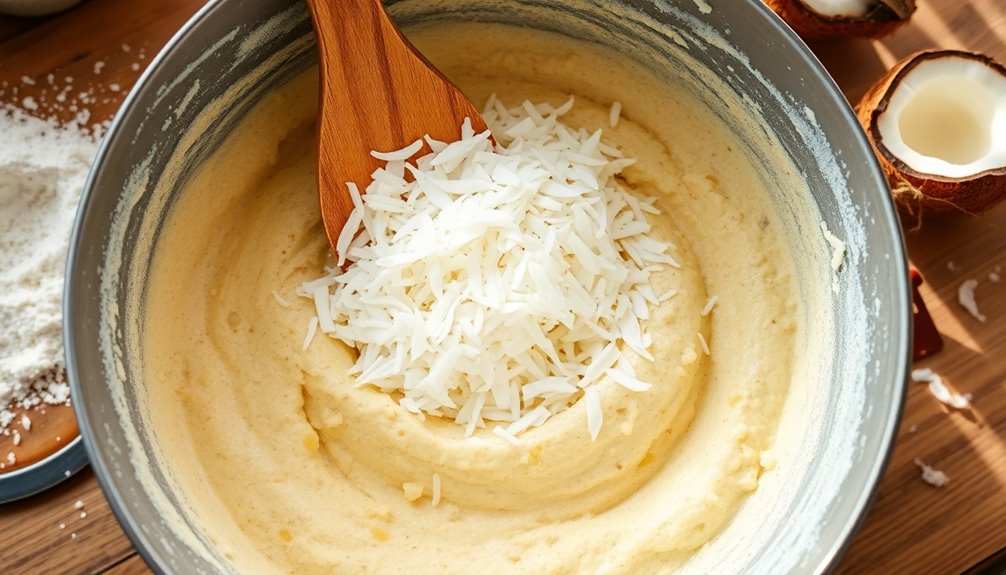
Once your wet ingredients are smoothly combined with the dry mixture, it's time to fold in the coconut flakes.
Grab a medium bowl and measure out about 1/2 to 1 cup of unsweetened shredded coconut. If you want an extra coconut flavor, consider toasting the flakes beforehand for a nuttier taste.
Using a rubber spatula, gently fold in the coconut flakes to ensure they're evenly distributed throughout the muffin batter. This step is crucial for achieving that delightful chewy texture in every bite.
Be careful not to overmix, as that can lead to dense muffins. With the coconut incorporated, you're one step closer to enjoying delicious coconut muffins with caramelized bananas!
Final Thoughts
Whether you're looking for a delicious breakfast treat or a sweet dessert, coconut muffins with caramelized bananas offer a delightful combination that's hard to resist.
The tropical flavor of coconut pairs perfectly with the rich sweetness of caramelized bananas, making each bite an experience you won't forget. Using ripe bananas ensures optimal sweetness and moisture, resulting in a tender texture throughout the muffins.
The chewy coconut flakes not only enhance the flavor but also add a unique texture that complements the soft bananas. For an extra touch, consider serving these muffins with whipped cream or vanilla ice cream, elevating the dish even further.
You'll find that this delightful combination is sure to satisfy your cravings anytime!
Frequently Asked Questions
Can I Substitute Coconut Flour for All-Purpose Flour?
Yes, you can substitute coconut flour for all-purpose flour, but keep in mind they behave differently.
Coconut flour absorbs a lot of moisture, so you'll need to adjust the liquid in your recipe. Typically, for every cup of all-purpose flour, use about ¼ cup of coconut flour and increase the liquid by about ½ cup.
Don't forget to add extra eggs for structure, as coconut flour doesn't provide the same binding properties.
How Can I Make These Muffins Gluten-Free?
To make your muffins gluten-free, you can substitute all-purpose flour with a gluten-free blend designed for baking.
Look for blends that contain ingredients like almond flour, rice flour, or oat flour. You might also consider adding a binding agent, like xanthan gum, to help with texture.
Adjust the liquid in your recipe slightly, as gluten-free flours can absorb moisture differently.
Experimenting will help you achieve the perfect gluten-free muffin!
What Are the Best Toppings for These Muffins?
When it comes to toppings, you've got plenty of delicious options!
You can sprinkle shredded coconut for extra texture, or drizzle honey or maple syrup for sweetness.
A dollop of whipped cream adds a creamy touch, while fresh fruit like berries or sliced bananas enhances flavor.
If you're feeling indulgent, consider a chocolate drizzle or some chopped nuts for crunch.
Experiment and find the combination that makes your taste buds sing!
Can I Freeze Leftover Muffins?
Absolutely, you can freeze leftover muffins! Just let them cool completely first.
Then, wrap each muffin tightly in plastic wrap or aluminum foil to prevent freezer burn. Place them in a freezer-safe bag or container, and label it with the date.
When you're ready to enjoy one, simply thaw it at room temperature or pop it in the microwave for a few seconds. They'll taste just as delicious after being frozen!
How Long Do These Muffins Stay Fresh?
Muffins generally stay fresh for about two to three days at room temperature when stored in an airtight container.
If you want to extend their freshness, you can refrigerate them, which can keep them good for up to a week.
For longer storage, consider freezing them; they'll maintain their quality for about three months.
Just make sure to wrap them well to prevent freezer burn.
Enjoy your muffins at their best!